Power Platform is an accessible development suite, integrated with Microsoft 365: Business Intelligence, low code / no code development, workflow automation, bots creation.
It is extremely rich for development teams as well as for end users (called Citizen Developers), but brings significant risks for the company’s data if not handled properly (especially with Power Apps and Power Automate):
- Phishing and obtaining user consent on their data.
- Data leakage via the bypassing of automatic email transfer rules.
- Extraction of data from uncontrolled storage spaces.
- Corruption of documents.
A set of security and governance measures must be implemented, whether it is chosen to deploy all or part of the Power Platform. But the main thing to do is to control who can use which service.
For a long time, I had in mind, as many others, that it was impossible to completely restrict a user’s access to the services. Indeed, Microsoft writes in its Q&A that “The Power Automate Free license is used only for tracking purposes. Enabling or disabling it has no effect on a user’s ability to create flows. If you disable the Power Automate Free license, it becomes enabled again when a user logs in.”
However, from what I’ve seen, it should be possible to make some interesting hardenings.
How can a user access to Power Apps and Power Automate by default?
Like any service in Office 365, the platform’s services are subject to a subscription model (license per user per month). Licensing a user grants him access to the service.
Let’s start by reviewing what exists: To make it simple, there are two types of Power Platform licenses:
- Free licenses are included in any Office 365 subscription and allow to create workflows and applications based on the platform services (e.g., Exchange Online, SharePoint Online, Teams, Azure AD, etc.) in a common environment.
- Premium licenses (or paid licenses) provide access to additional features: more than 400 premium connectors (including HTTP), the creation of environments to segregate applications, additional capacity, etc.
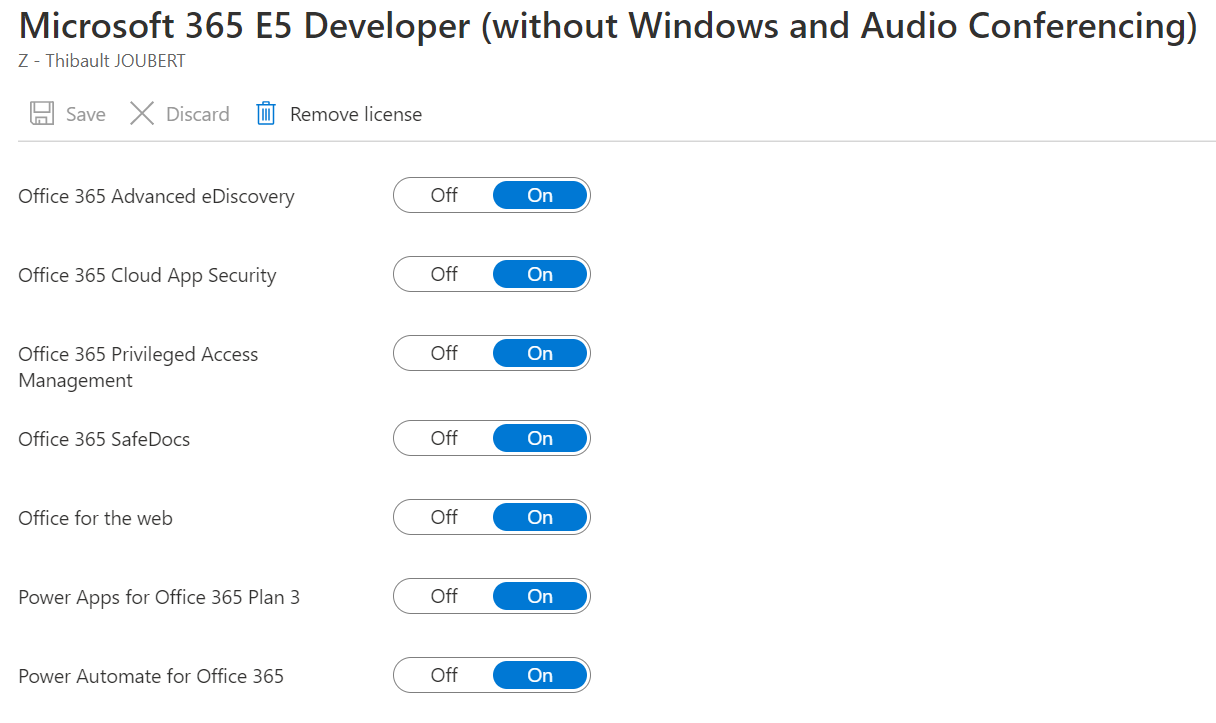
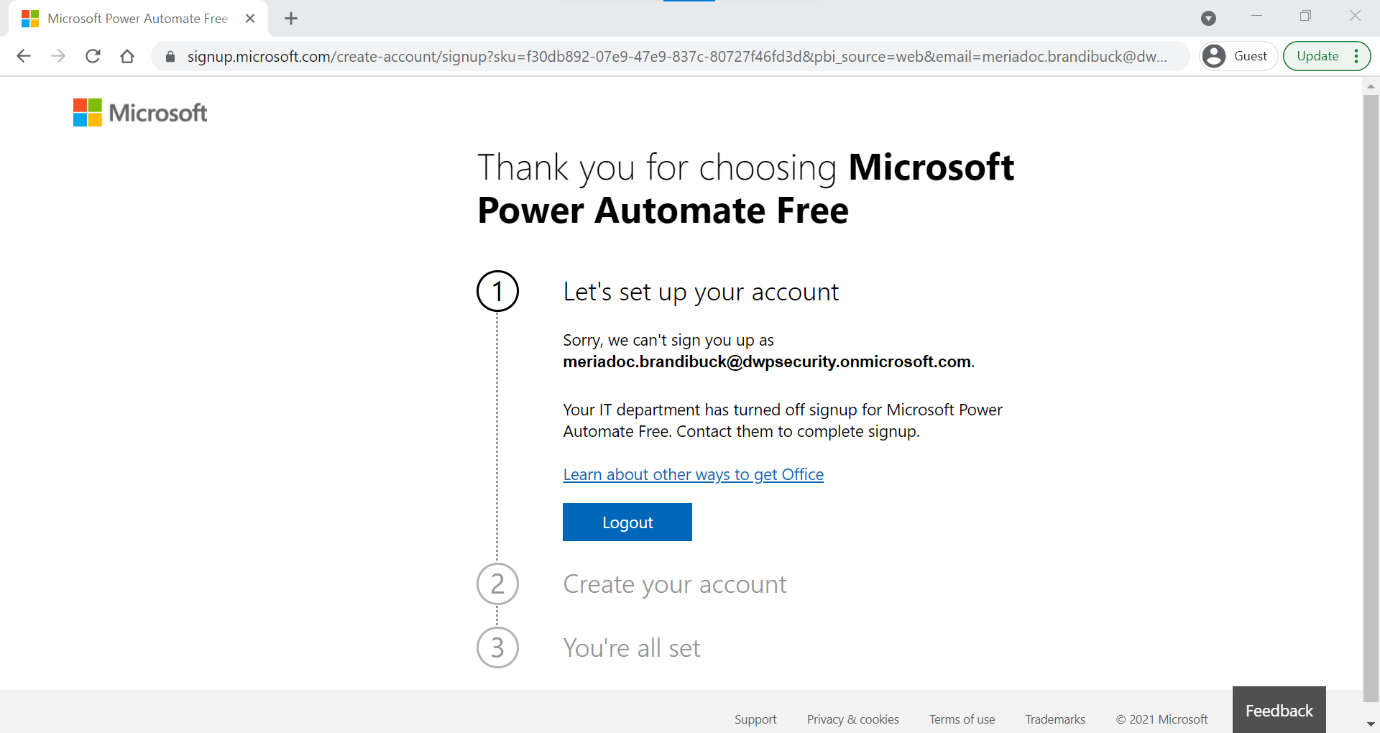
Turning off the “Power Apps for Office 365” and “Power Automate for Office 365” services has no effect unlike what one might think. Even with both services “Off”, a user could still create a workflow or create an app with his professional identity.
Let’s take an example of an employee with an Office E3 license without “Power Apps for Office 365” and “Power Automate for Office 365”.
Default access to Power Automate
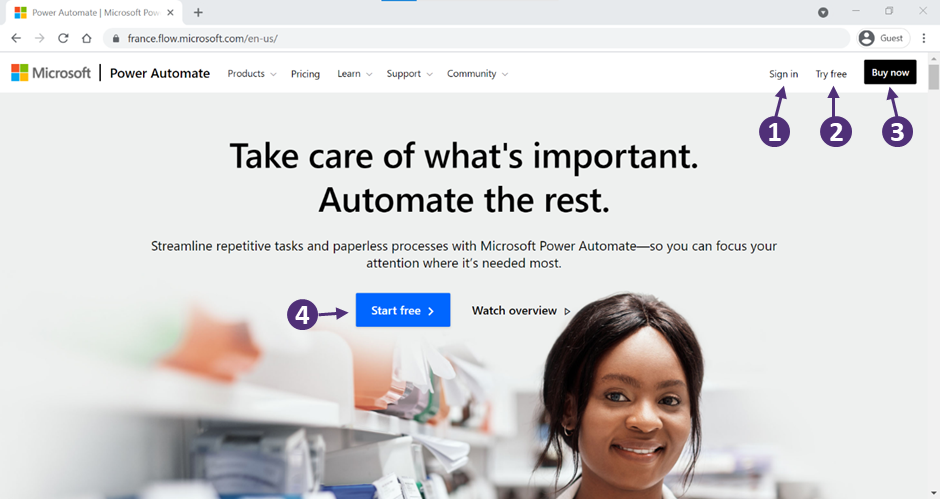
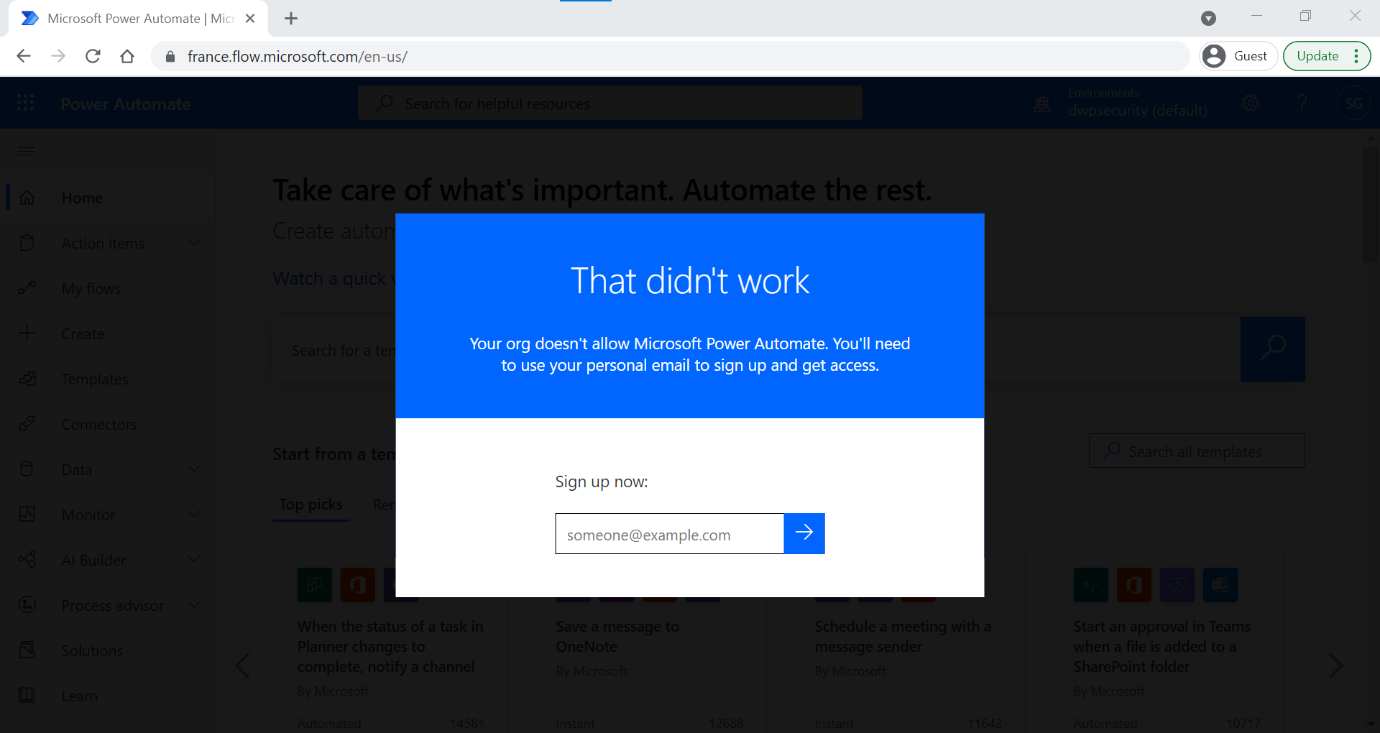
Our user wants to create a new workflow to forward his mails to his personal address.
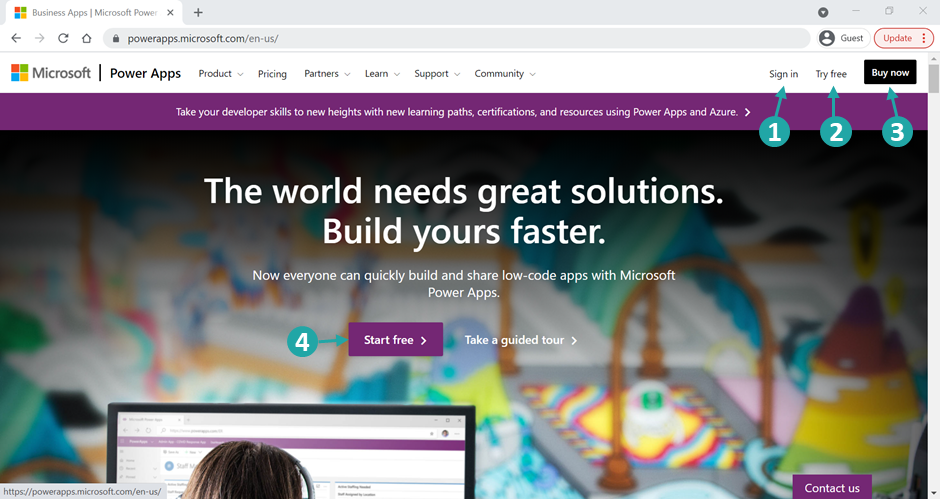
When he reaches https://france.flow.microsoft.com/en-us/, he lands on the page below. Without any configuration by the organization, four possibilities are offered by default:
- “Sign In”
- “Try free”
- “Buy now”
- “Start free”
1. “Sign in”: Access to services in shadow mode
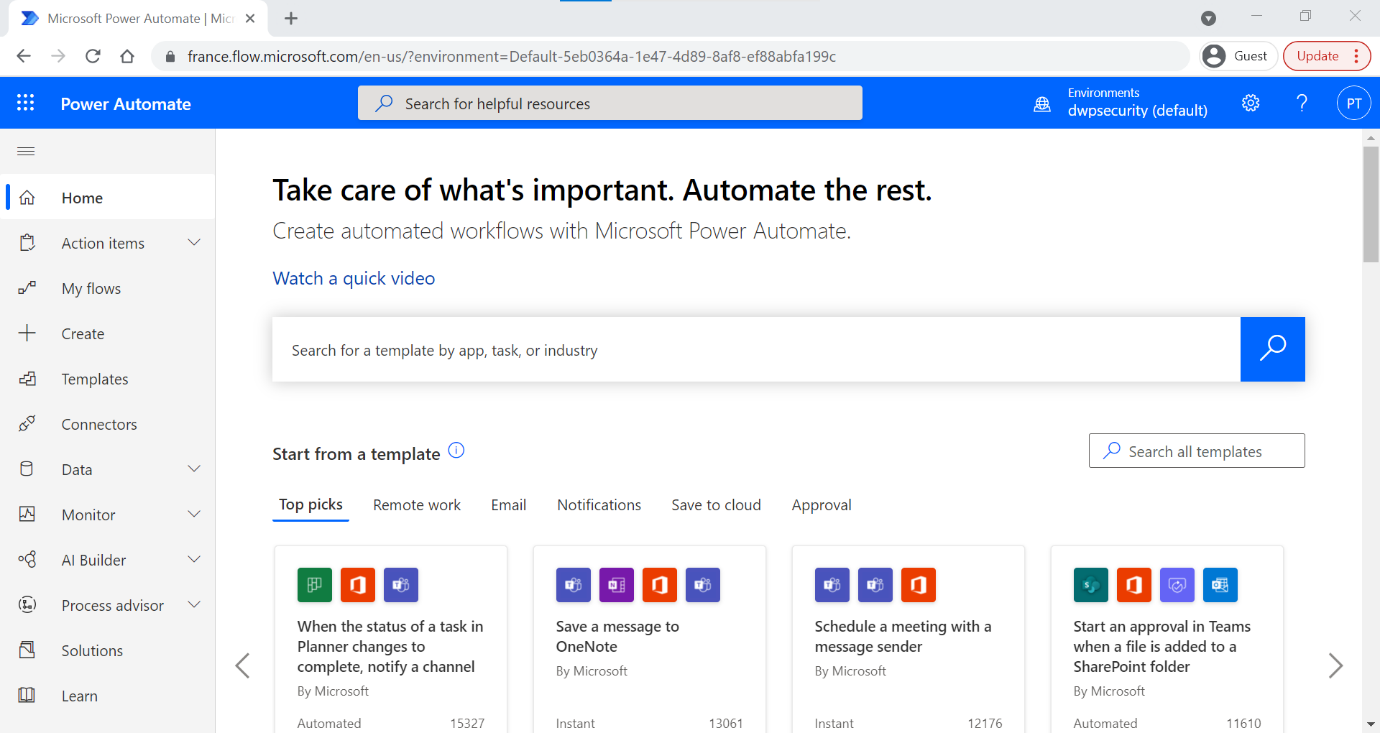
After clicking on “sign in”, the user accesses the service, after selecting the region of use. Note that he does not get any free license, which makes him a shadow user. Another thing to note is that the Power Automate and Power Apps services will not appear in the Office 365 waffle for the user.
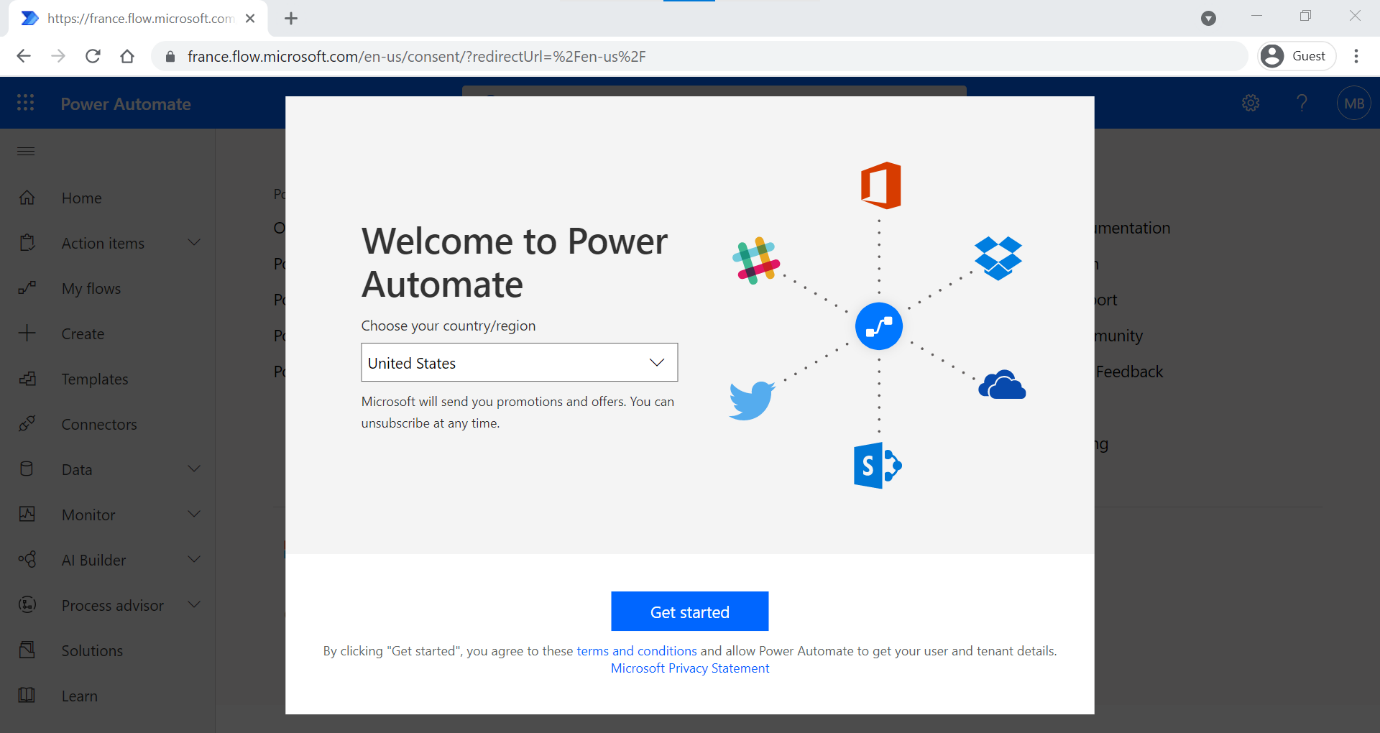
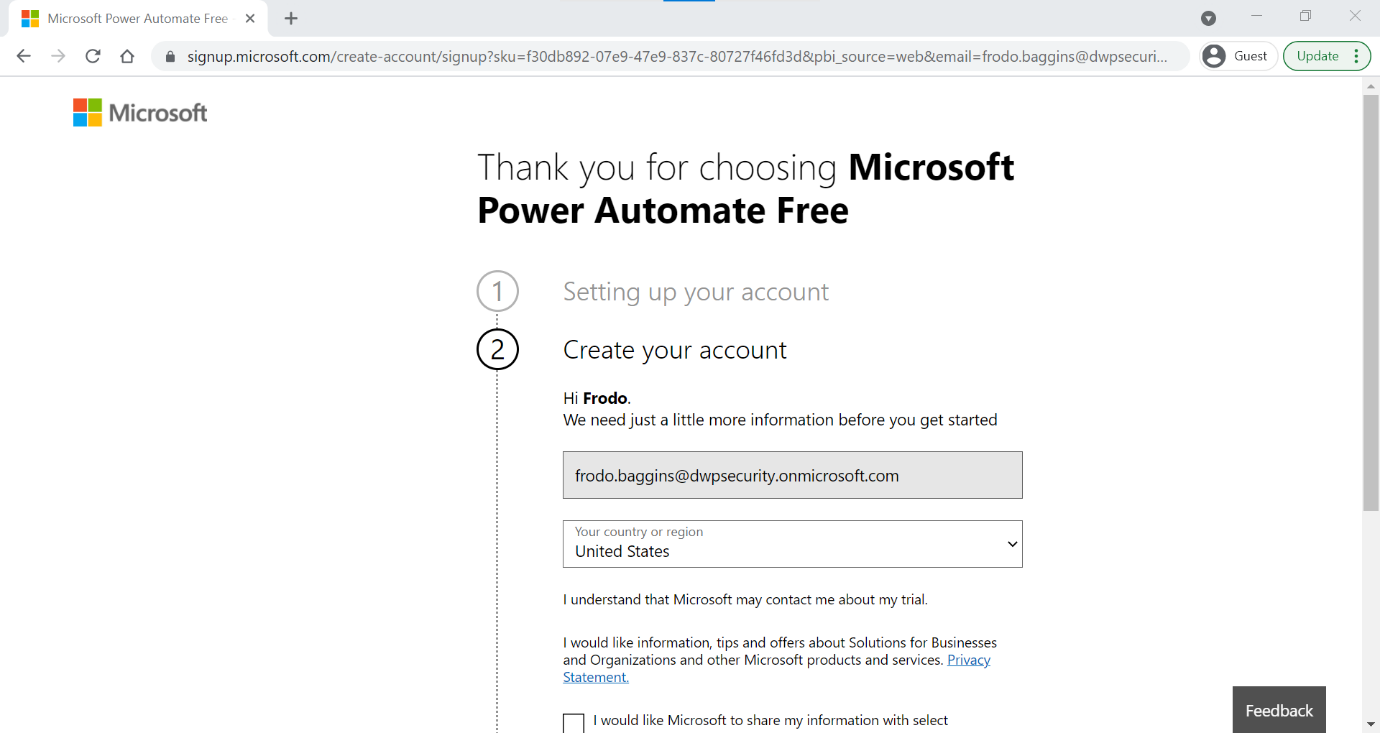
2. “Try free”: Access to services and obtaining a “Free” license
After clicking on “Try free”, the user is taken to a page where he is told that he is accessing the service in a free version. As soon as he accepts the terms of use, he gets a “Microsoft Power Automate Free” license. An administrator can use this license to track who creates or uses workflows.
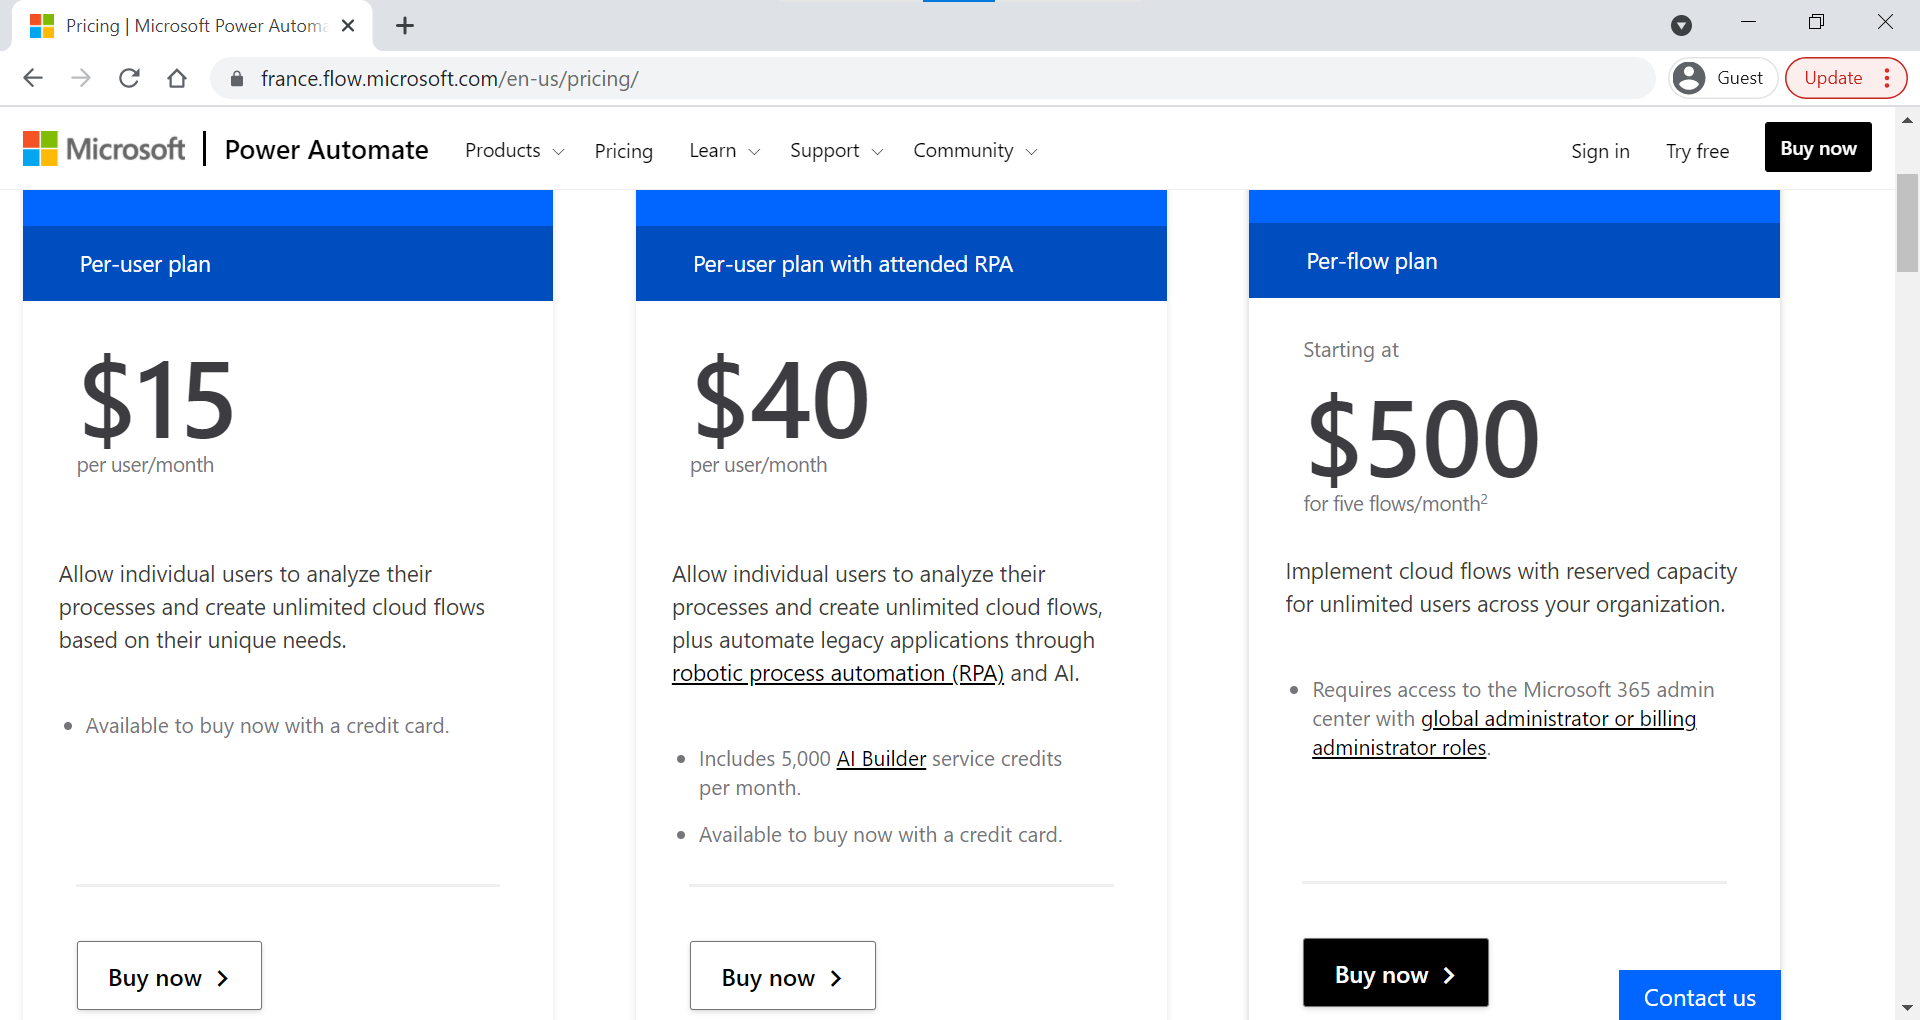
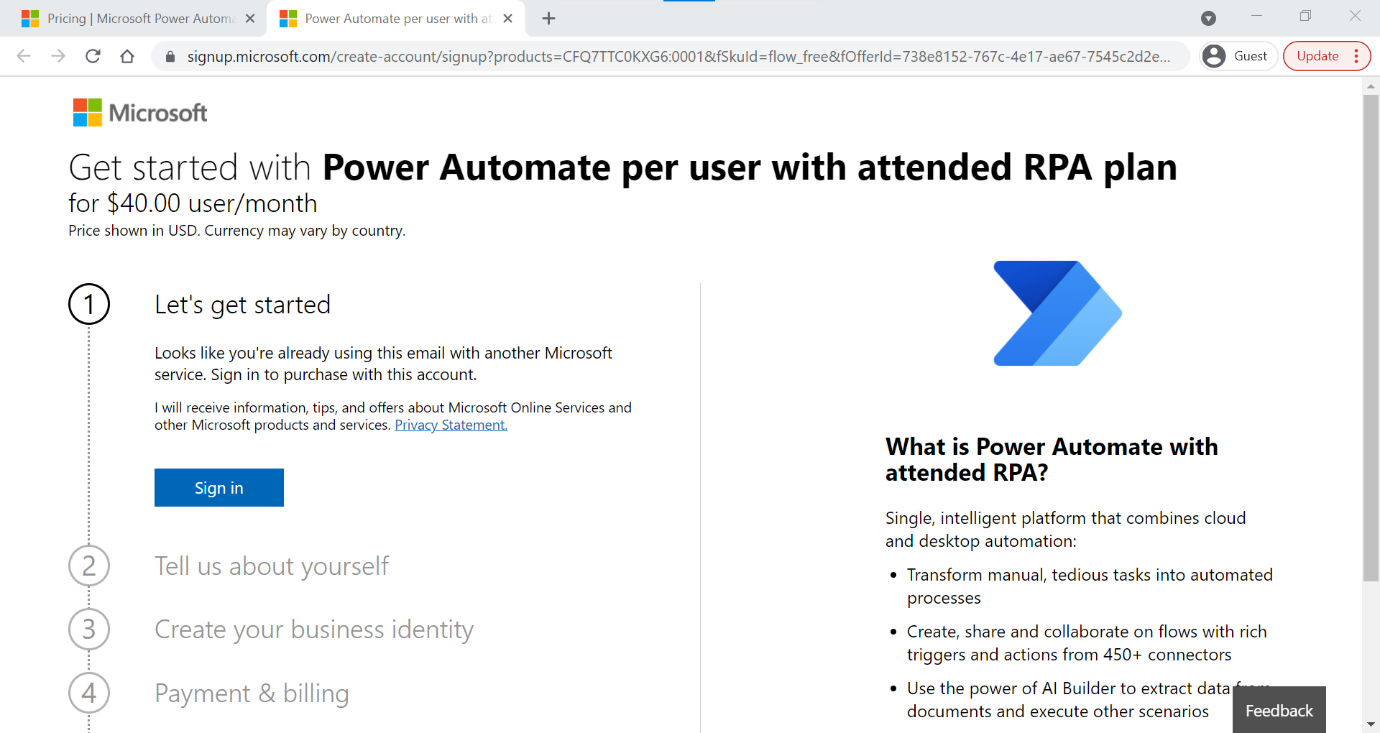
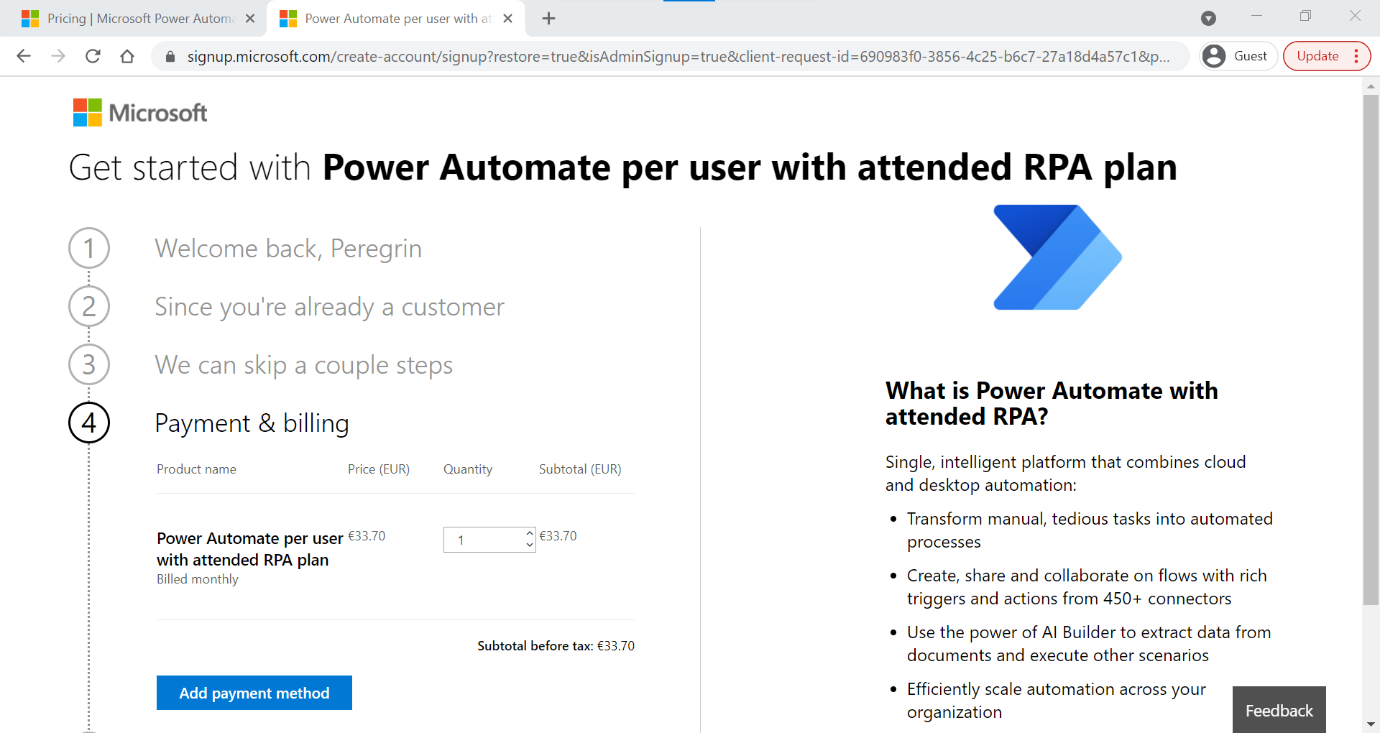
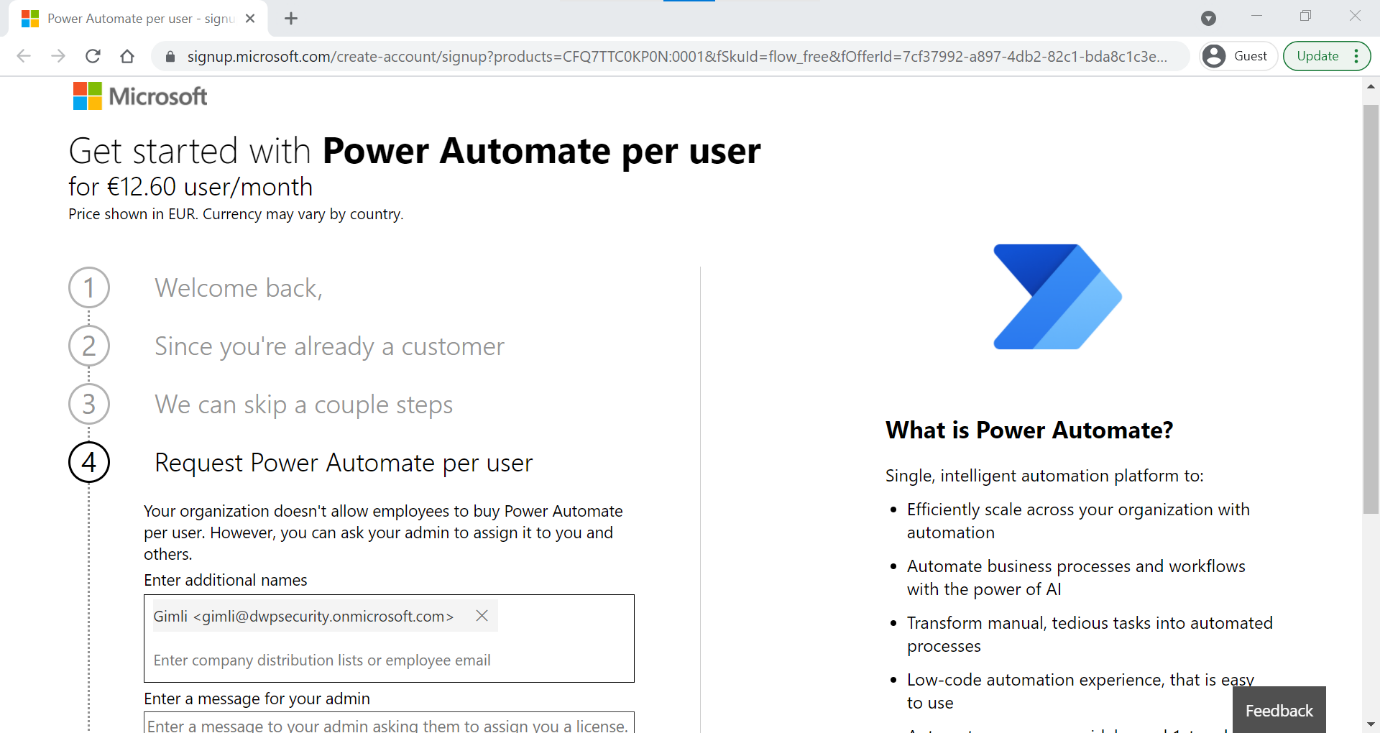
3. “Buy now”: Self-service for premium licenses
After clicking on “Buy now”, the user is offered the various paid license plans of the service. The user can then enter his credit card information to purchase a self-service license plan that will allow him to access the premium features.
4. “Start free”: same as “Try free”
After clicking on “Start free”, the user follows the same process as for “Try free”.
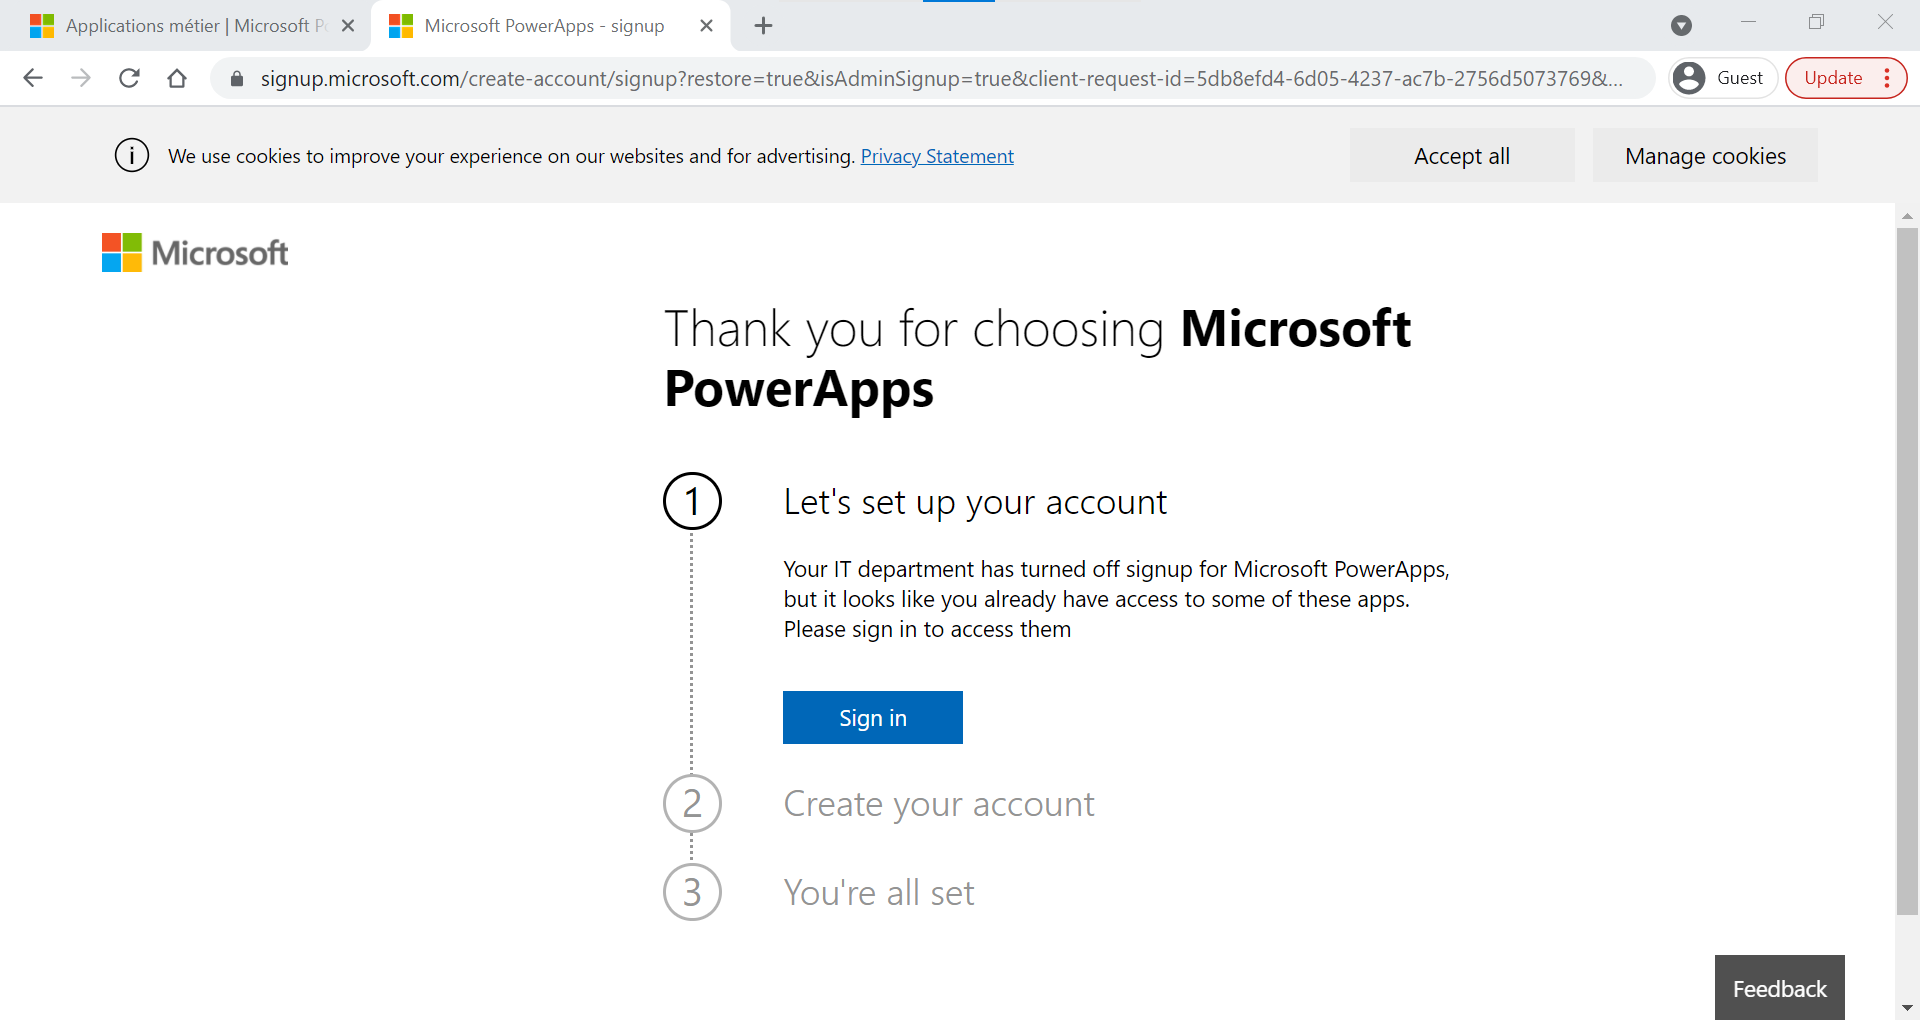
Default access to Power Apps
Our user then wants to create an application to collect data for a project.
When he reaches https://make.powerapps.com/, he lands on the page below. Without any configuration by the organization, four possibilities are offered by default:
- “Sign In”
- “Try free”
- “Buy now”
- “Start free”
The findings remain the same as for Power Automate with a few exceptions:
- There is no “Microsoft Power Automate Free” license that allows tracking of users creating or using applications.
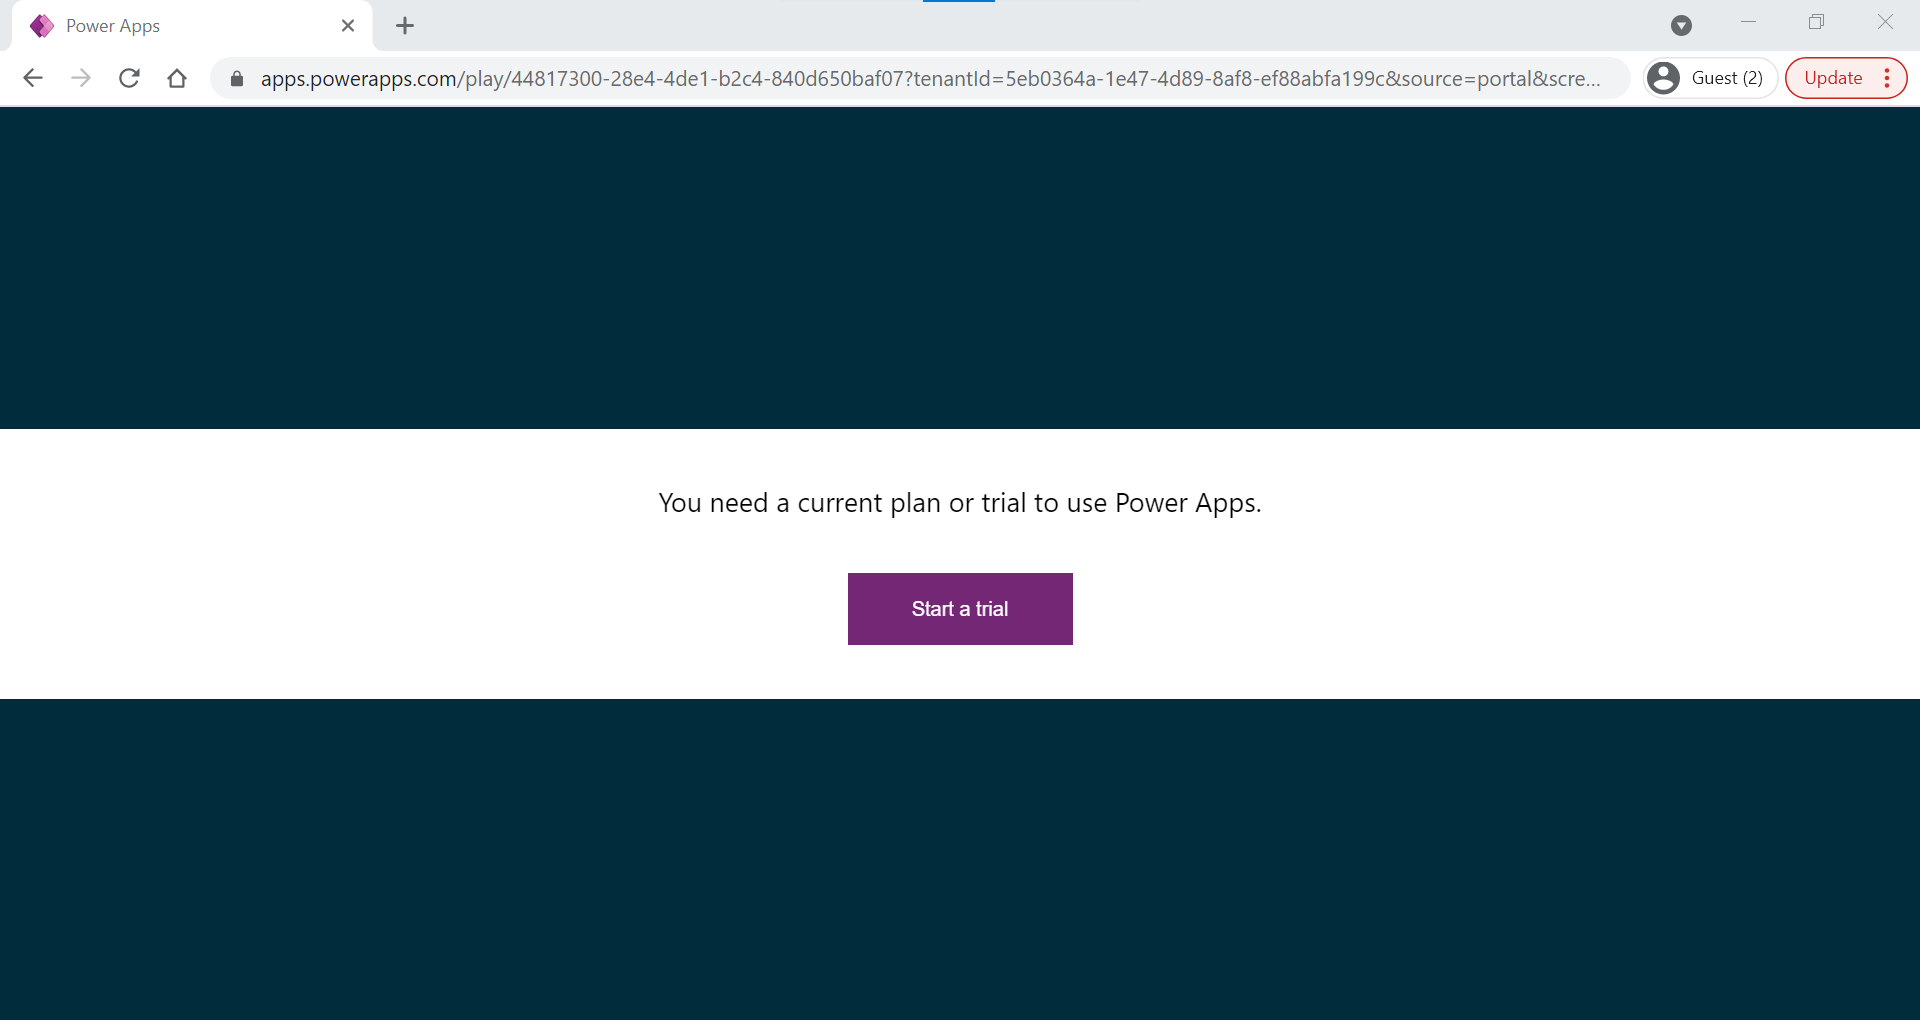
- A user without a license can still create an application.
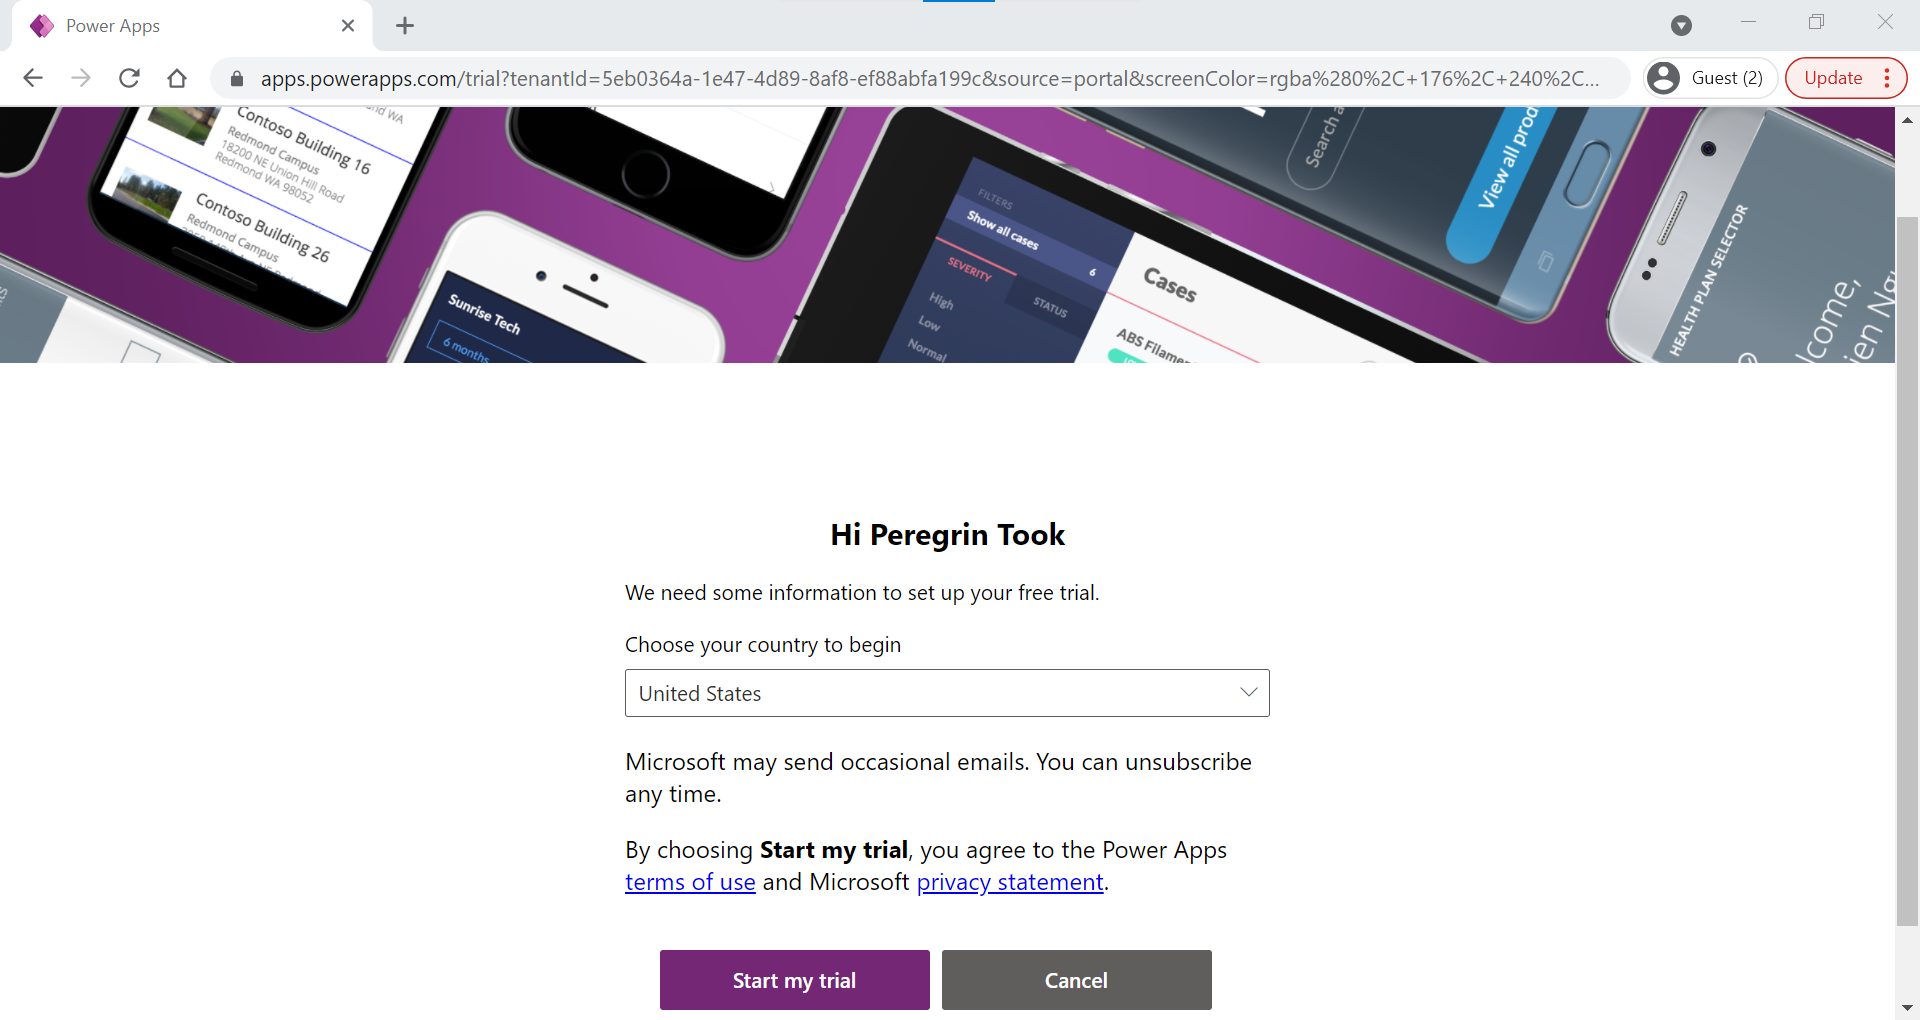
- A user without a license who wants to run an application will see an error message telling him that he does not have a license. But he will be able to subscribe to a trial license (see screenshot below)
Thus, we have seen that disabling the “Power Automate for Office 365” and “Power Apps for Office 365” licenses is not enough to control who can use these services. It is necessary to go further.
How to control the subscription to a free license?
Two possibilities are offered in PowerShell to block the subscription to a free Power Platform license for an unauthorized user.
1st possibility: Configuration of AllowAdHocSubscriptions
The first possibility, which is generally used by companies, is to restrict self-service subscriptions to trial or free versions based on the email address (e.g. Power Automate, Azure RMS, etc.)
# Sign in to the PowerShell module
Get-MsolCompanyInformation | Select AllowAdHocSubscriptions

# Check the current status of AllowAdHocSubscriptions
Get-MsolCompanyInformation | Select AllowAdHocSubscriptions

# Sign in to the PowerShell module
Set-MsolCompanySettings -AllowAdHocSubscriptions $false

# Check the new status of AllowAdHocSubscriptions
Get-MsolCompanyInformation | Select AllowAdHocSubscriptions
This solution blocks options 2 (Try free) and 4 (Start free), but does not prevent the user from “signing in” or subscribing to a paid version.
2nd possibility: Deactivation of trial and developer license plans
The second possibility, much less known, is to disable the possibility to subscribe to a trial license or a developer plan. In the Microsoft documentation, I found only a small reference lost in the PowerShell documentation for PowerApps.
# Sign in to the PowerShell module
Add-PowerAppsAccount

# Check the current allowed plans
Get-AllowedConsentPlans

# Remove the Internal and Viral plans
Remove-AllowedConsentPlans -Types @("Internal", "Viral")
According to the documentation:
- ”Internal” consent plans are either trial licenses or developer plans that users can sign themselves up for via Power Apps/Power Automate portals. “Ad-hoc subscription”
- “Viral” consent plans are trial licenses that users can sign themselves up for via https://signup.microsoft.com or admins can assign to users via Azure Active Directory (Azure AD) or the Microsoft 365 admin portal.


This is the only interesting option I could test and validate to ensure that a user cannot access a free version of the Power Automate or Power Platform services.
This command is especially interesting because it also removes all trial and developer plans already subscribed.
However, there are two major limitations to keep in mind:
Power Automate: all flows created by a user will continue to run. To remediate this situation, it will be necessary for an admin to deactivate or delete them manually.
Power Platform: a user without a license will still be able to create an application and share it. However, he will not be able to run an application, whether it is one of their own or another person’s. In this case, it will be necessary to set up supervision to detect this use case.
How to control the subscription to a paid license?
With the outcry against self-service for end-users to buy paid licenses with their credit card last year, Microsoft introduced a way to block it. Currently, this can only be done in PowerShell with the commands below:
# Sign in to the PowerShell module
Connect-MSCommerce

# Check the statut of the self-service capabilities
Get-MSCommerceProductPolicies -PolicyId AllowSelfServicePurchase

# Block the self service for all enabled possibilities
Get-MSCommerceProductPolicies -PolicyId AllowSelfServicePurchase | ? {$\_.PolicyValue -eq "Enabled" } | ForEach {Update-MSCommerceProductPolicy -PolicyId AllowSelfServicePurchase -ProductId $\_.ProductId -Enabled $False }

# Check the statut of the self-service capabilities
Get-MSCommerceProductPolicies -PolicyId AllowSelfServicePurchase
From this point, only users who have been assigned a license by an administrator will be able to take full advantage of the features of the Power Automate and Power Apps.
Wait! One more thing
You have locked all the options on your tenant and now have control over all the users able to create or use Power Apps or Power Automate. That’s great! Is it enough? No, not completely!
A detail which is important here: Power Apps and Power Automate are free services. Any user can create a flow or an application from a personal account… and create a connection with their professional account (e.g. OneDrive for Business or Exchange Online). This simply means bypassing all the security and governance measures in place:
- No insight on usage and flows in place
- No Data Policy
- Etc.
The only possible measure to cover this risk is to implement cross-tenant restrictions (or tenants isolation) on Power Platform. These are not to be confused with the tenant restrictions on Azure AD. To implement them, it is necessary today to open a ticket to Microsoft. It will soon be possible to implement them directly in the Power Platform administration center. However, the Public Preview seems to have been delayed to September 2021.
And what about other workflow services?
Finally, some good news! All third-party workflow services I’ve tried seem to require application registration on Azure AD and user / admin consent, before providing access to business data. So, if this is handled, you can control who can do Power Automate(-like) or Power Apps(-like). If not, this gives you a new topic to quickly address with your teams.