In my former life as a consultant, I met a lot of organizations, during my audits or assignments, that were facing difficulties to set up an efficient watch to (try to) follow the numerous evolutions related to Office 365.
With the core services of Office 365 (SharePoint Online, Exchange Online, etc.), the Power Platform, Azure Active Directory, security services… there are so many things that move every month or every day that it is impossible to keep up with everything. Regardless of the size of the organization (150 users or +150k people), it is still necessary to keep up to date with the evolutions that could affect the user experience or the security of the platform, not to mention the new benefits brought.
To ease the tracking of Microsoft 365 evolutions, I implemented workflows with Power Automate to gather the main information source I follow in one place. In a first article, I described how I follow the Message Center and the Microsoft official blogs.
In this second article, I tackle with:
- Microsoft 365 Roadmap
- Other blogs (individual or solutions)
Microsoft – Roadmap
To keep up with the Microsoft 365 Roadmap information, I didn’t reinvite the wheel. I rely on the awesome Office 365 Roadmap Watch site which offers:
- A “browse by Feature” page
- A RSS flow
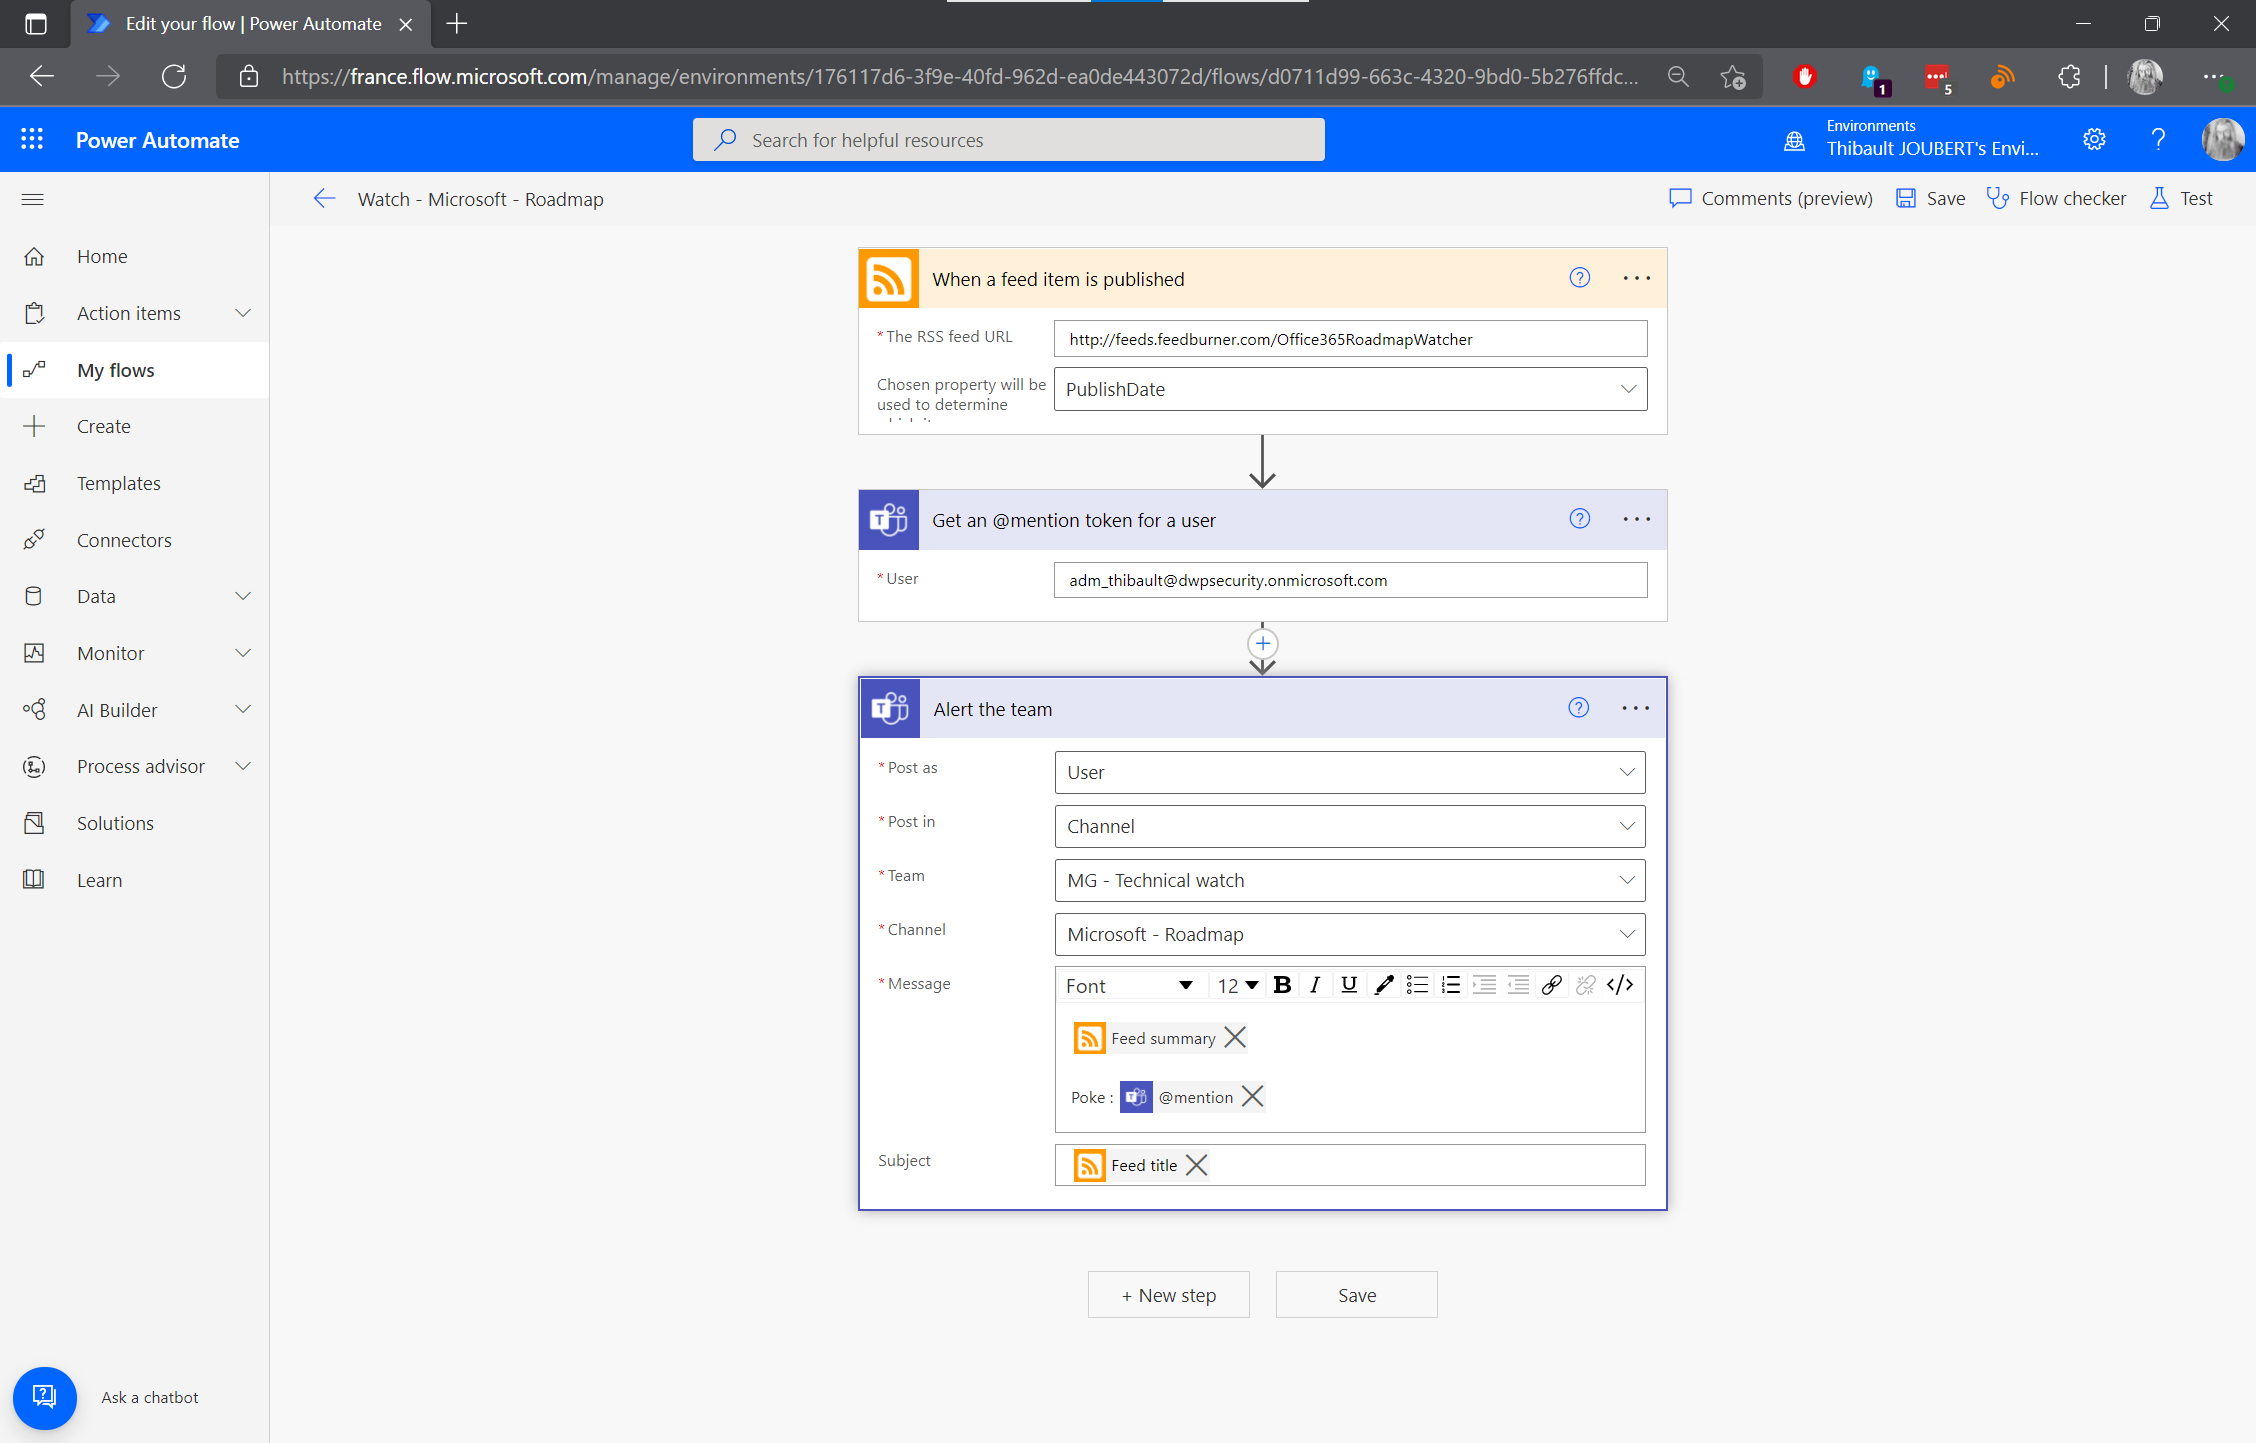
Step 1: Retrieval of the RSS feed elements as soon as they are published
Step 2: I get an @mention to notify my account (by my monitoring account “Palantir”)
Step 3: Publication of the information in my Teams channel “Microsoft – Roadmap”
And here we go in Teams:
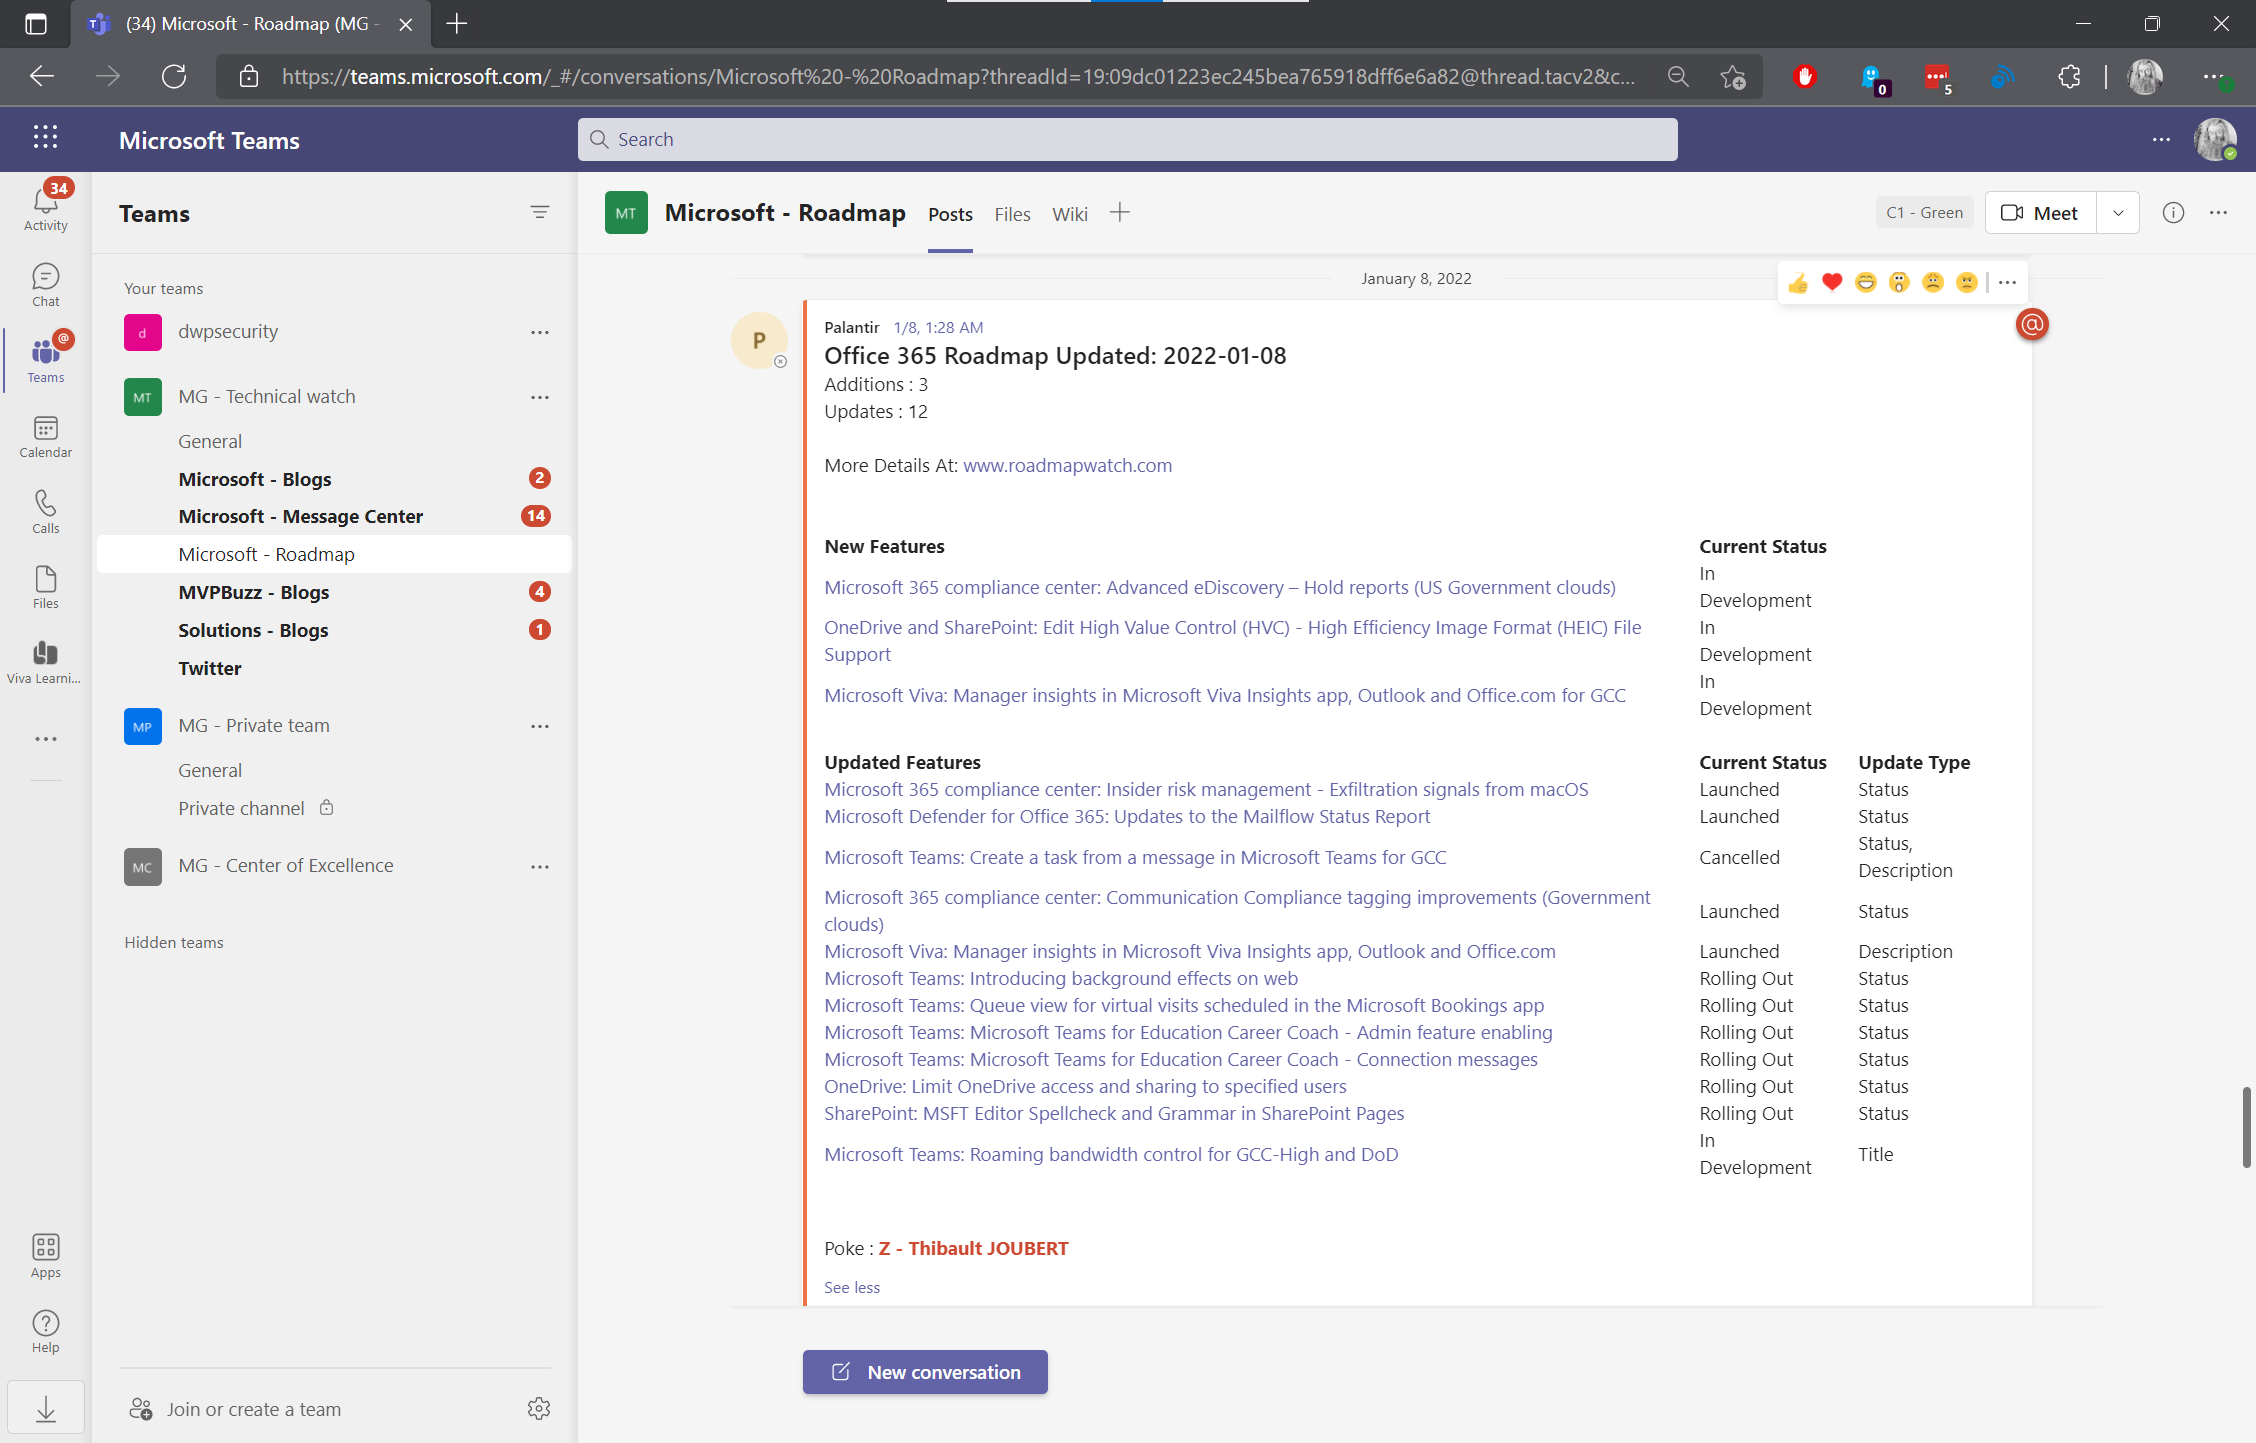
Every night (between 1:30 and 2:30 am French time), I get the evolution of the roadmap in my Team.
MVPBuzz – Blogs
To follow the blog posts that inspire me (#CommunityRocks, #MVPBuzz), I made the same flow as “Watch - Microsoft - Blogs”.
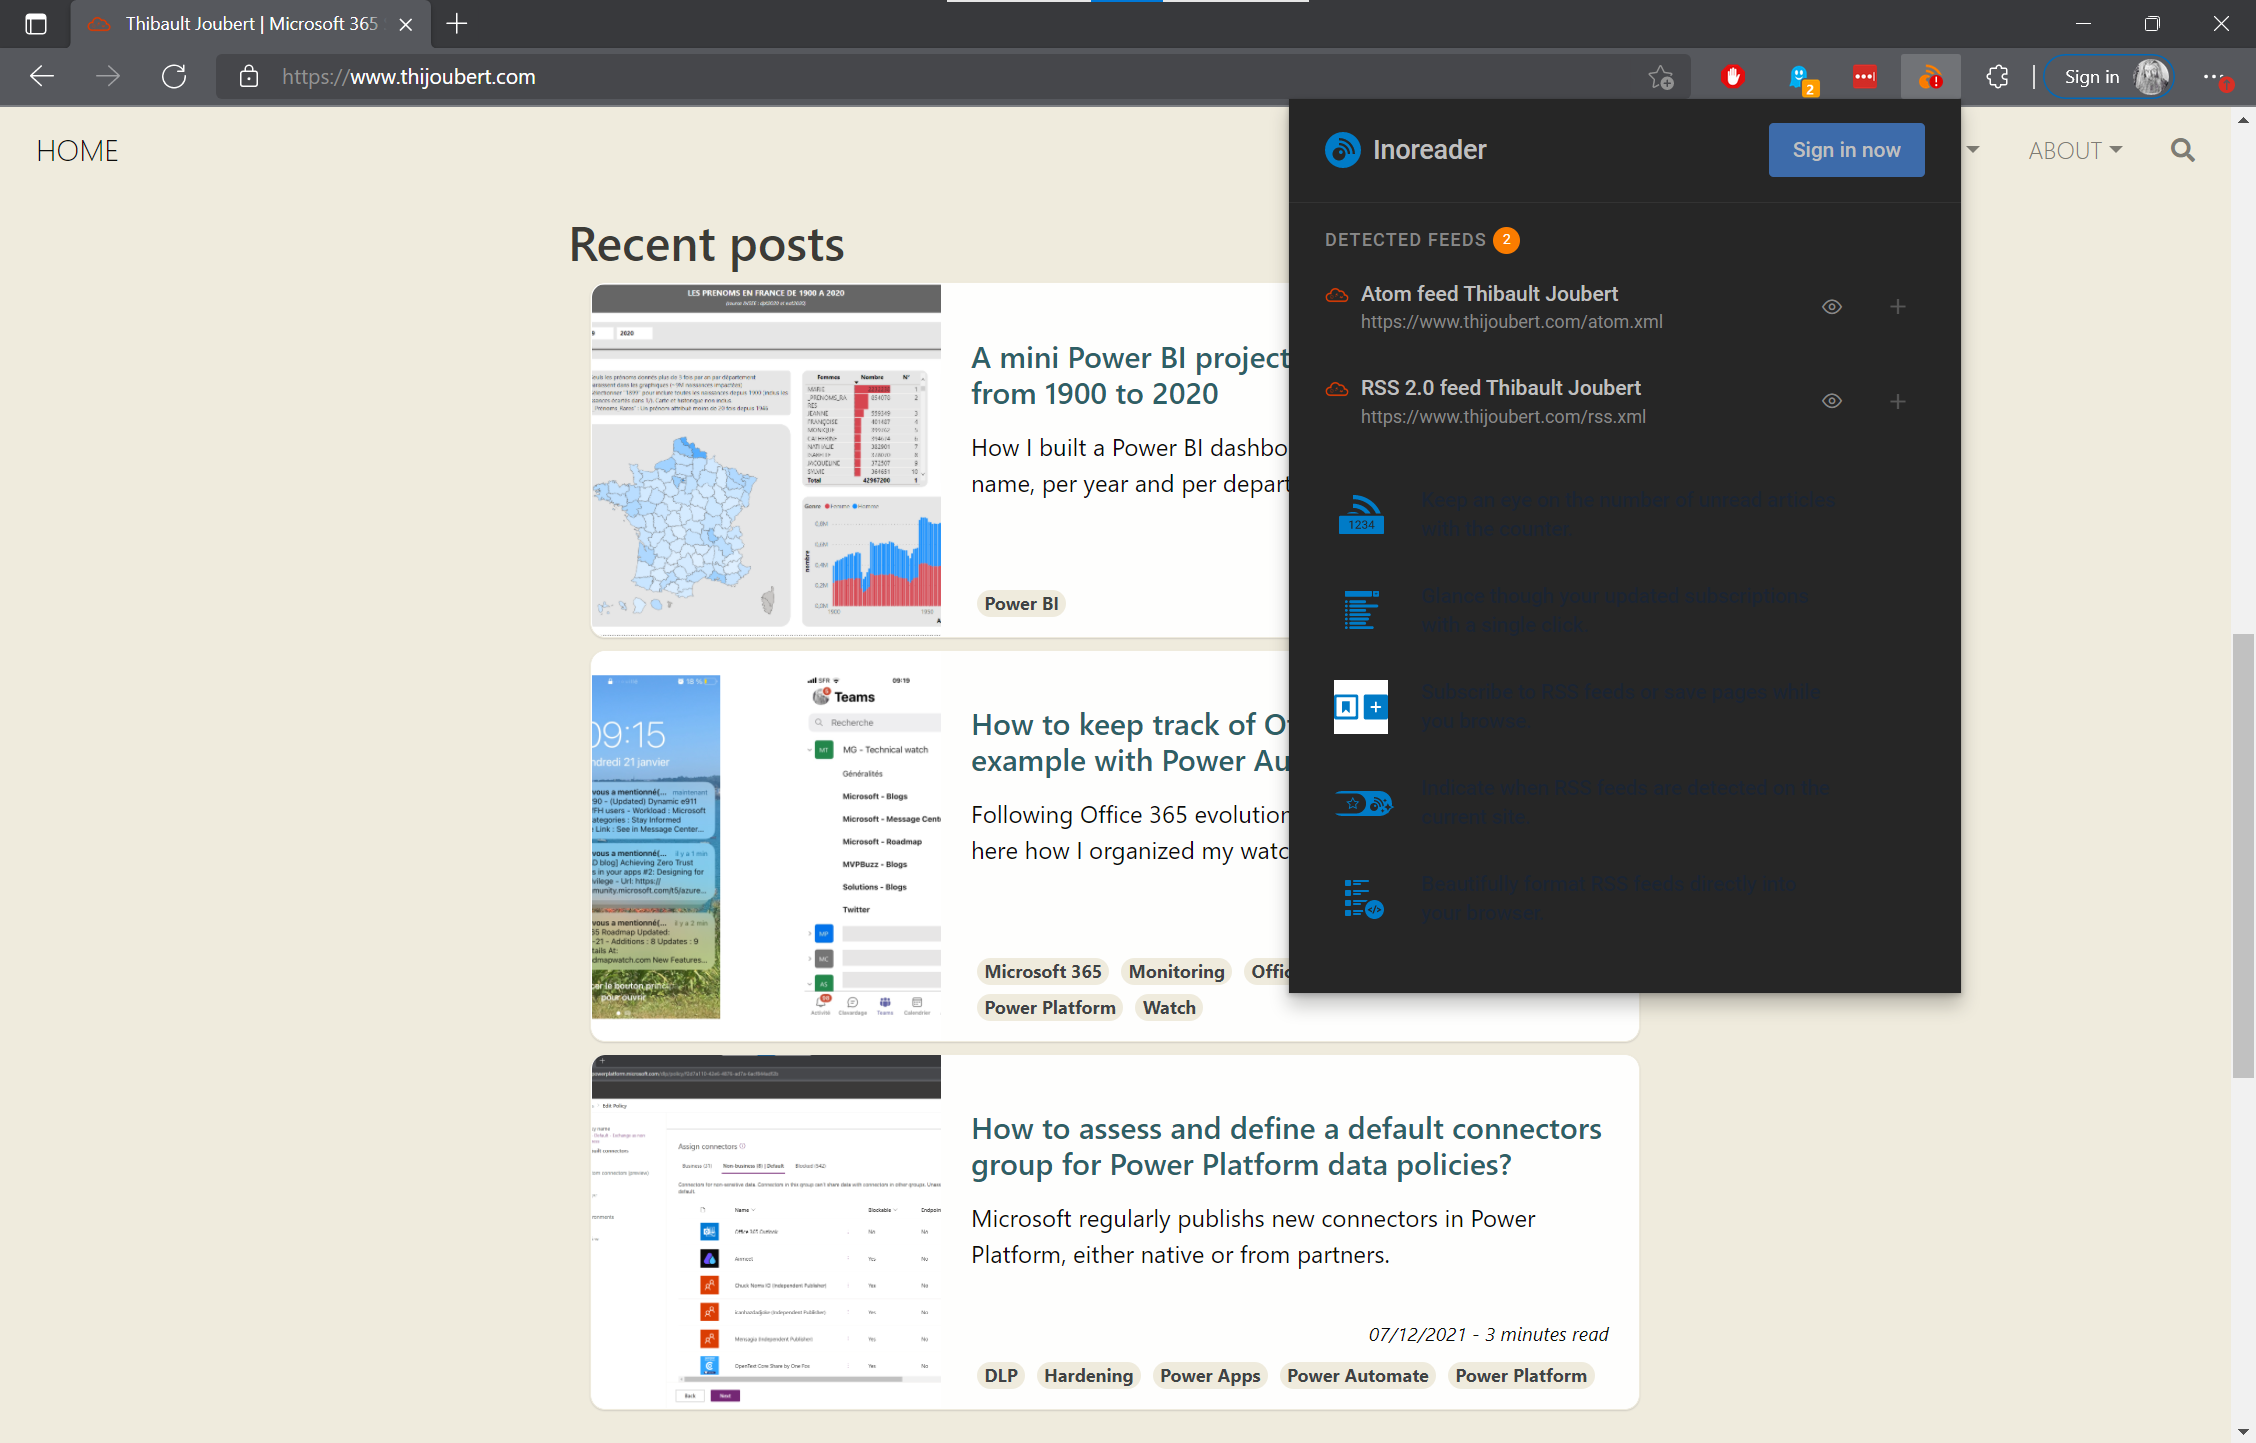
To think about adding useful blogs, I have a handy little extension for my browser: InorReader. This extension allows to find the RSS feeds of the page or the site.
The choice is difficult: there are so many interesting blogs that adding them all can quickly be counterproductive: one of the initial objectives was to spend as little time as possible on monitoring. Forcing yourself to read 5 articles every day and digging into the subjects behind them can become very time consuming.
Il suffit alors de le récupérer et de l’ajouter dans le flux Power Automate.
Solutions – Blogs
Pour suivre les articles de solutions ou d’entreprises, j’ai réalisé le même flux que « Watch – Microsoft – Blogs » et « Watch – MVPBuzz – Blog ».
Following the main blogs is good! Being able to follow the feed, and see what is not covered by the different blogs (which can happen even if it is rare), is even better.
For this, I created a “Watch - Twitter” feed to follow about 50 influencers.
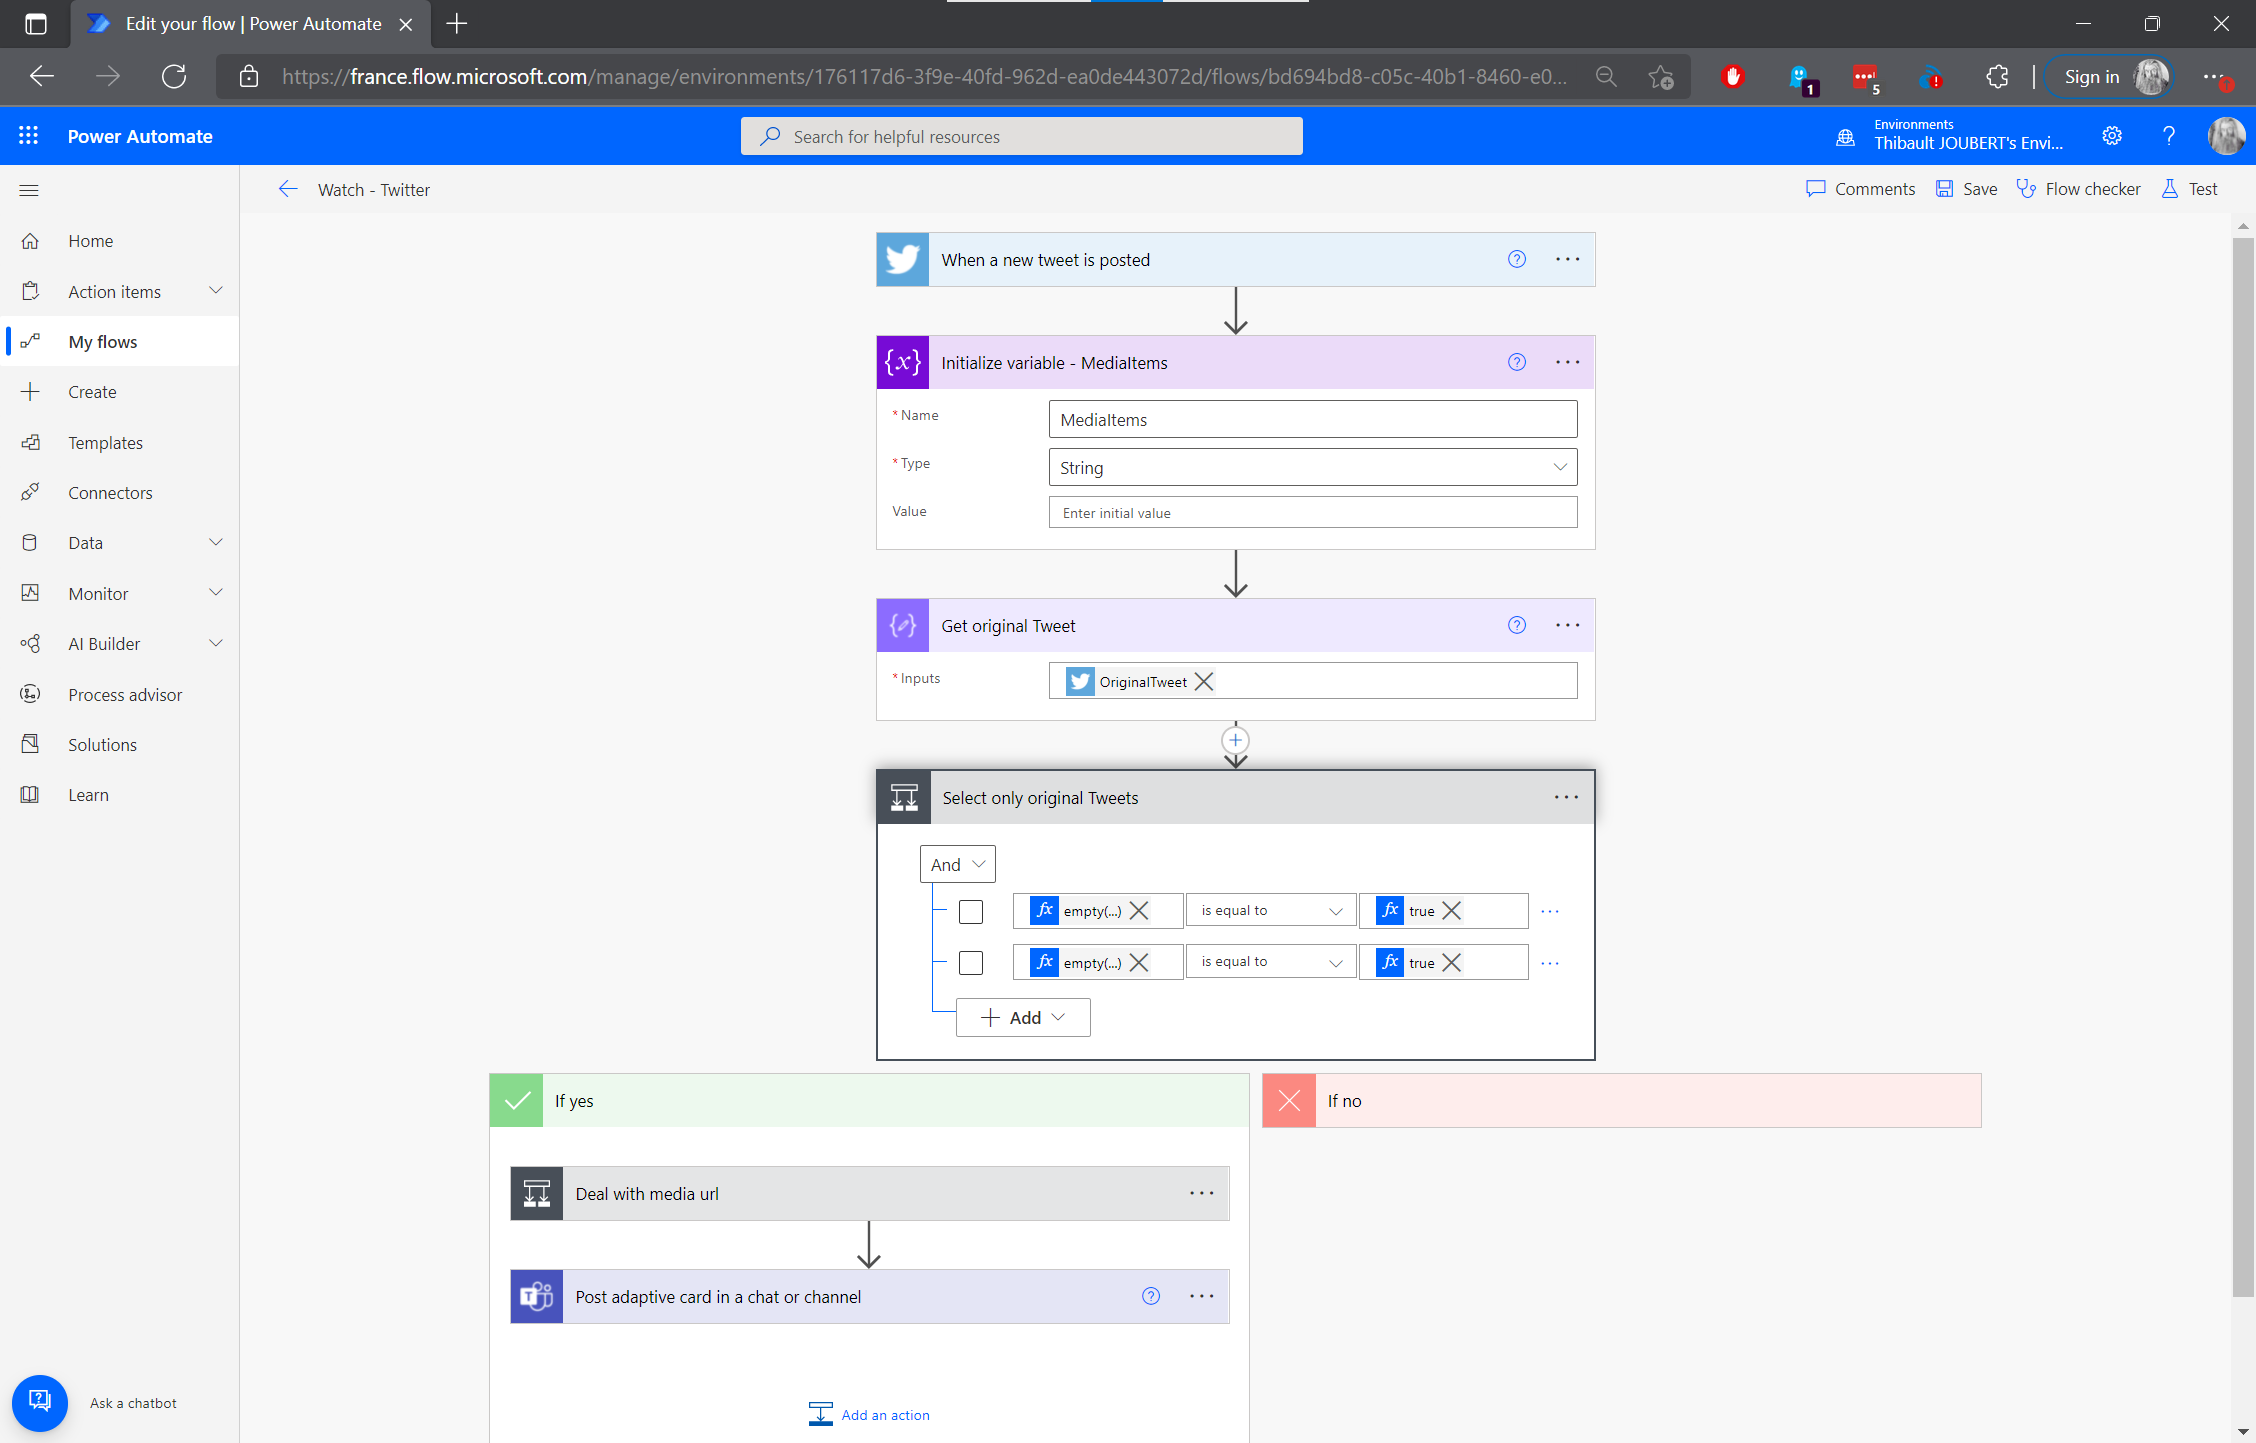
Step 1: Triggering the flow when a Tweet is posted by one of your followers
*from:@people1 OR from:@people2 OR from:@people3*
Step 2: Initialization of the “MediaItems” variable to retrieve the images of the Tweets (unfortunately the documents will not be retrieved)
At this moment, I check two conditions to avoid the surrounding noise: I want to retrieve only the Tweets and not the Retweets nor the Reply’s. For that, I look if there is an OriginalTweet or if there is a person to whom the user replies.
Step 3: Get the original Tweet Step 4: Add a condition: if “OriginalTweet” or “TweetInReplyToUserId” is non-zero, then I stop here.
If I continue then, the next thing is to get the shared images (often screenshots useful to evaluate the interest of the Tweet).
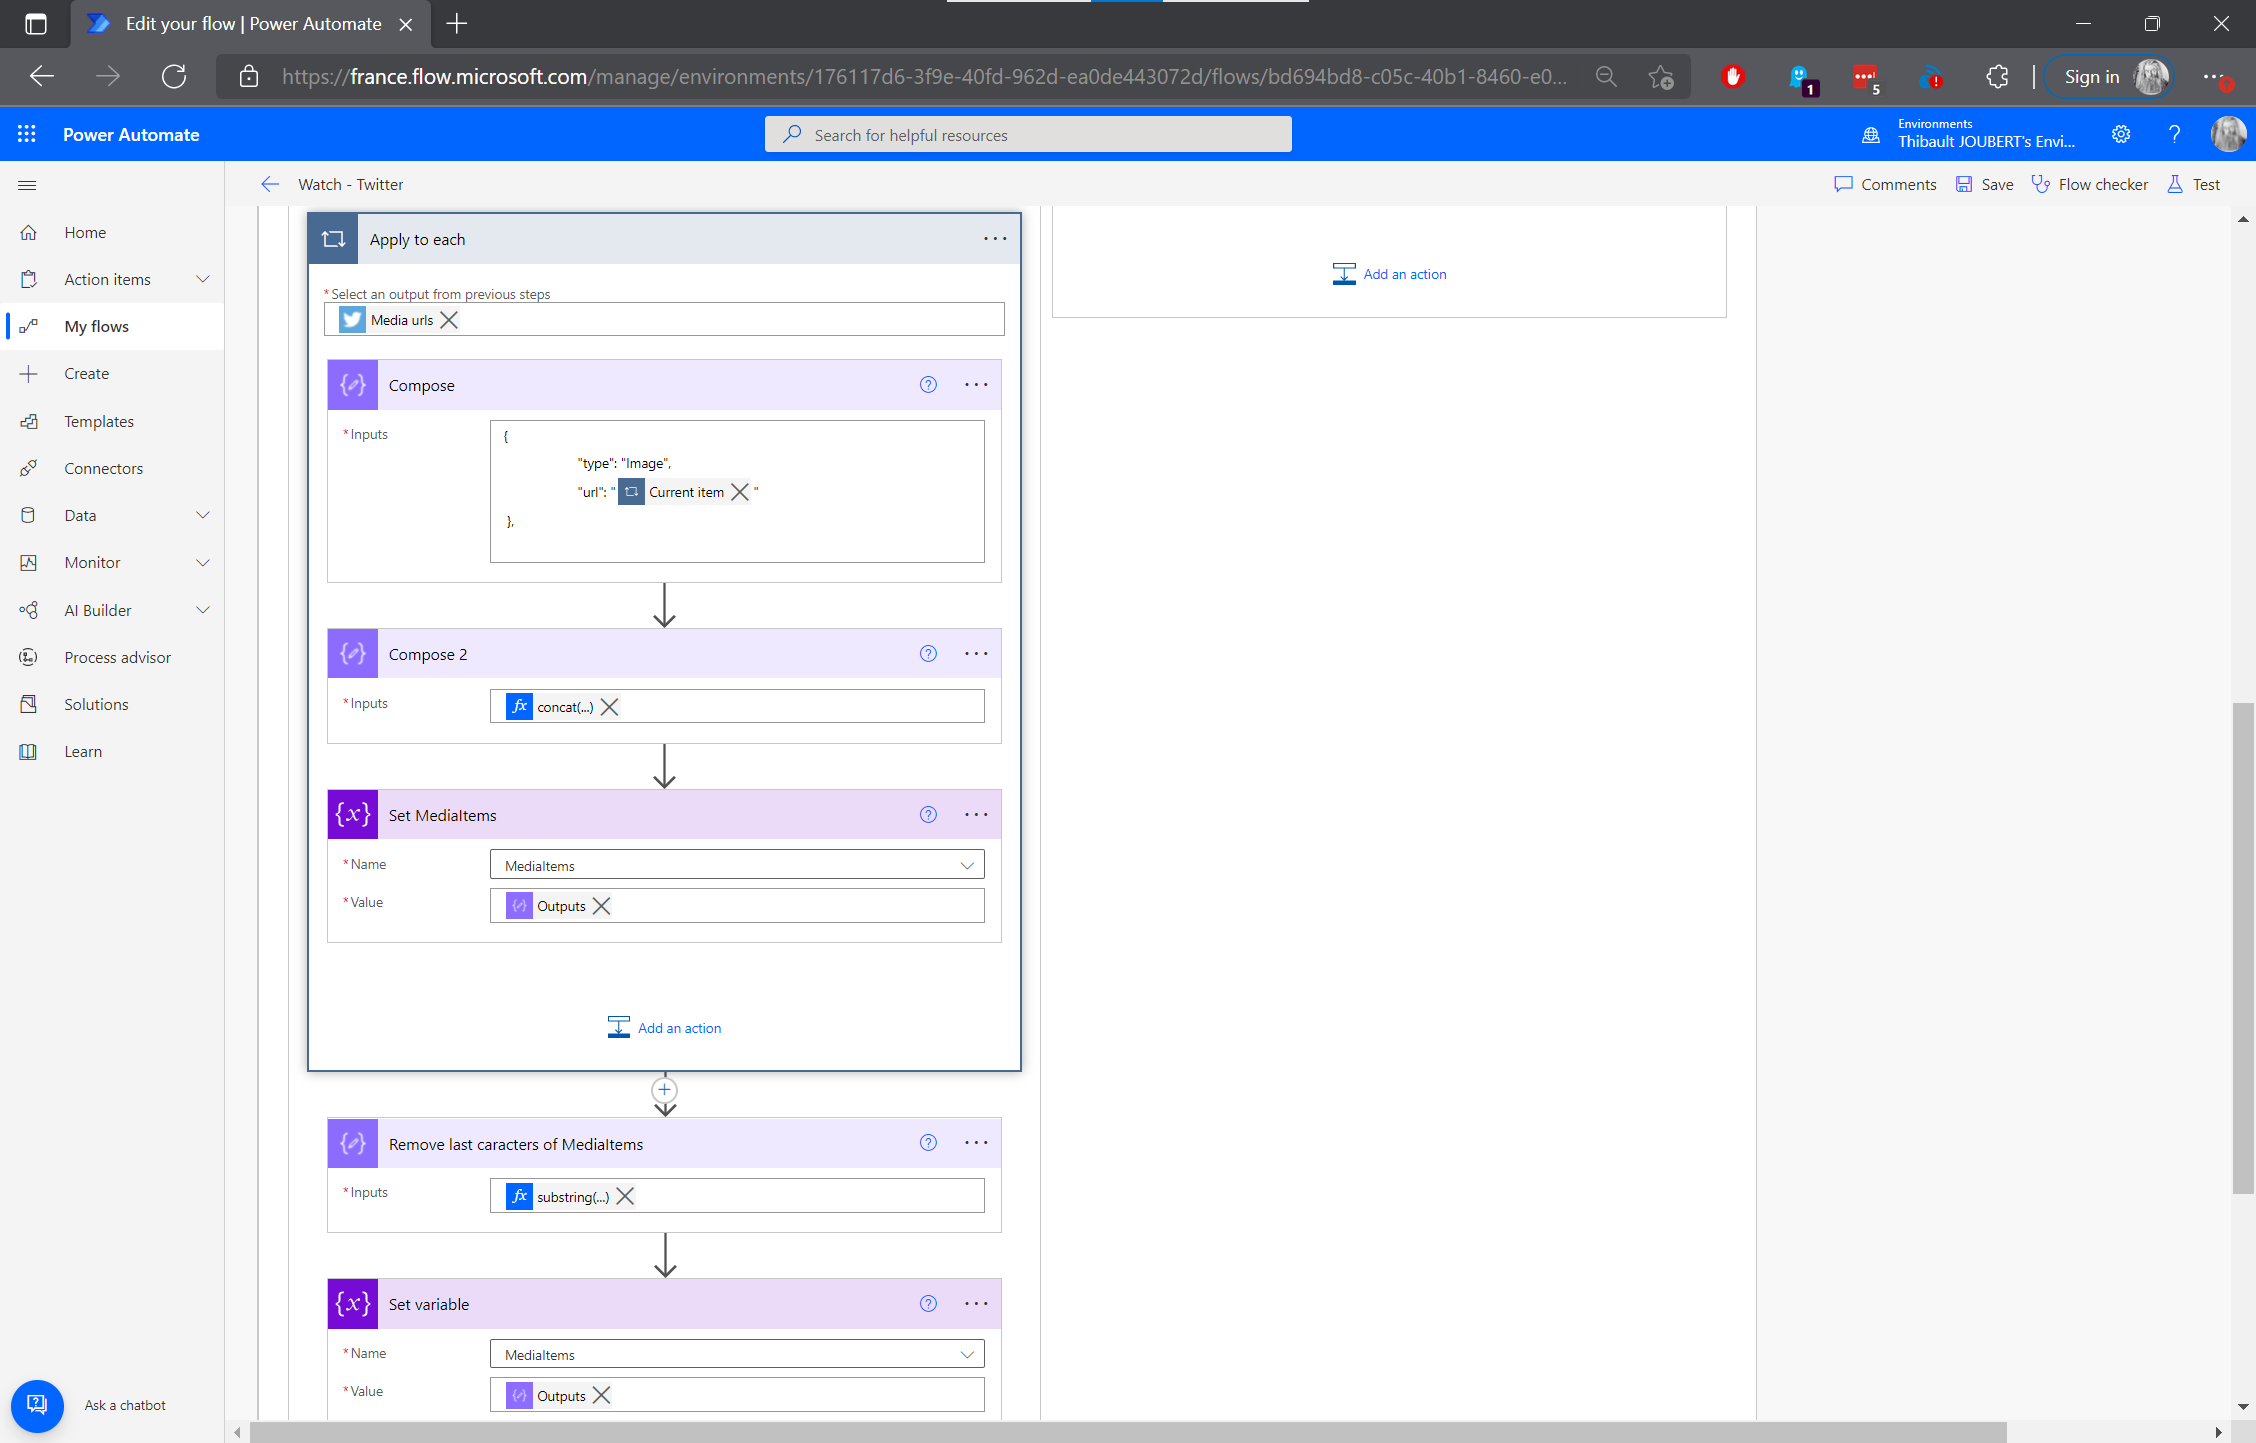
For each of the Media Url, I get the Url and add it to a JSON list of Media Url.
Step 5: Compose:
{
    "type": "Image",
    "url": "@{items('Apply\_to\_each')}"
},
Step 6: Compose:
concat(variables('MediaItems'),outputs('Compose'))
Step 7: Concatenation of the variable « MediaItems” and the current Media Url
Step 8: Removal of the last characters of “MediaItems”
substring(variables('MediaItems'),0,sub(length(variables('MediaItems')),3))
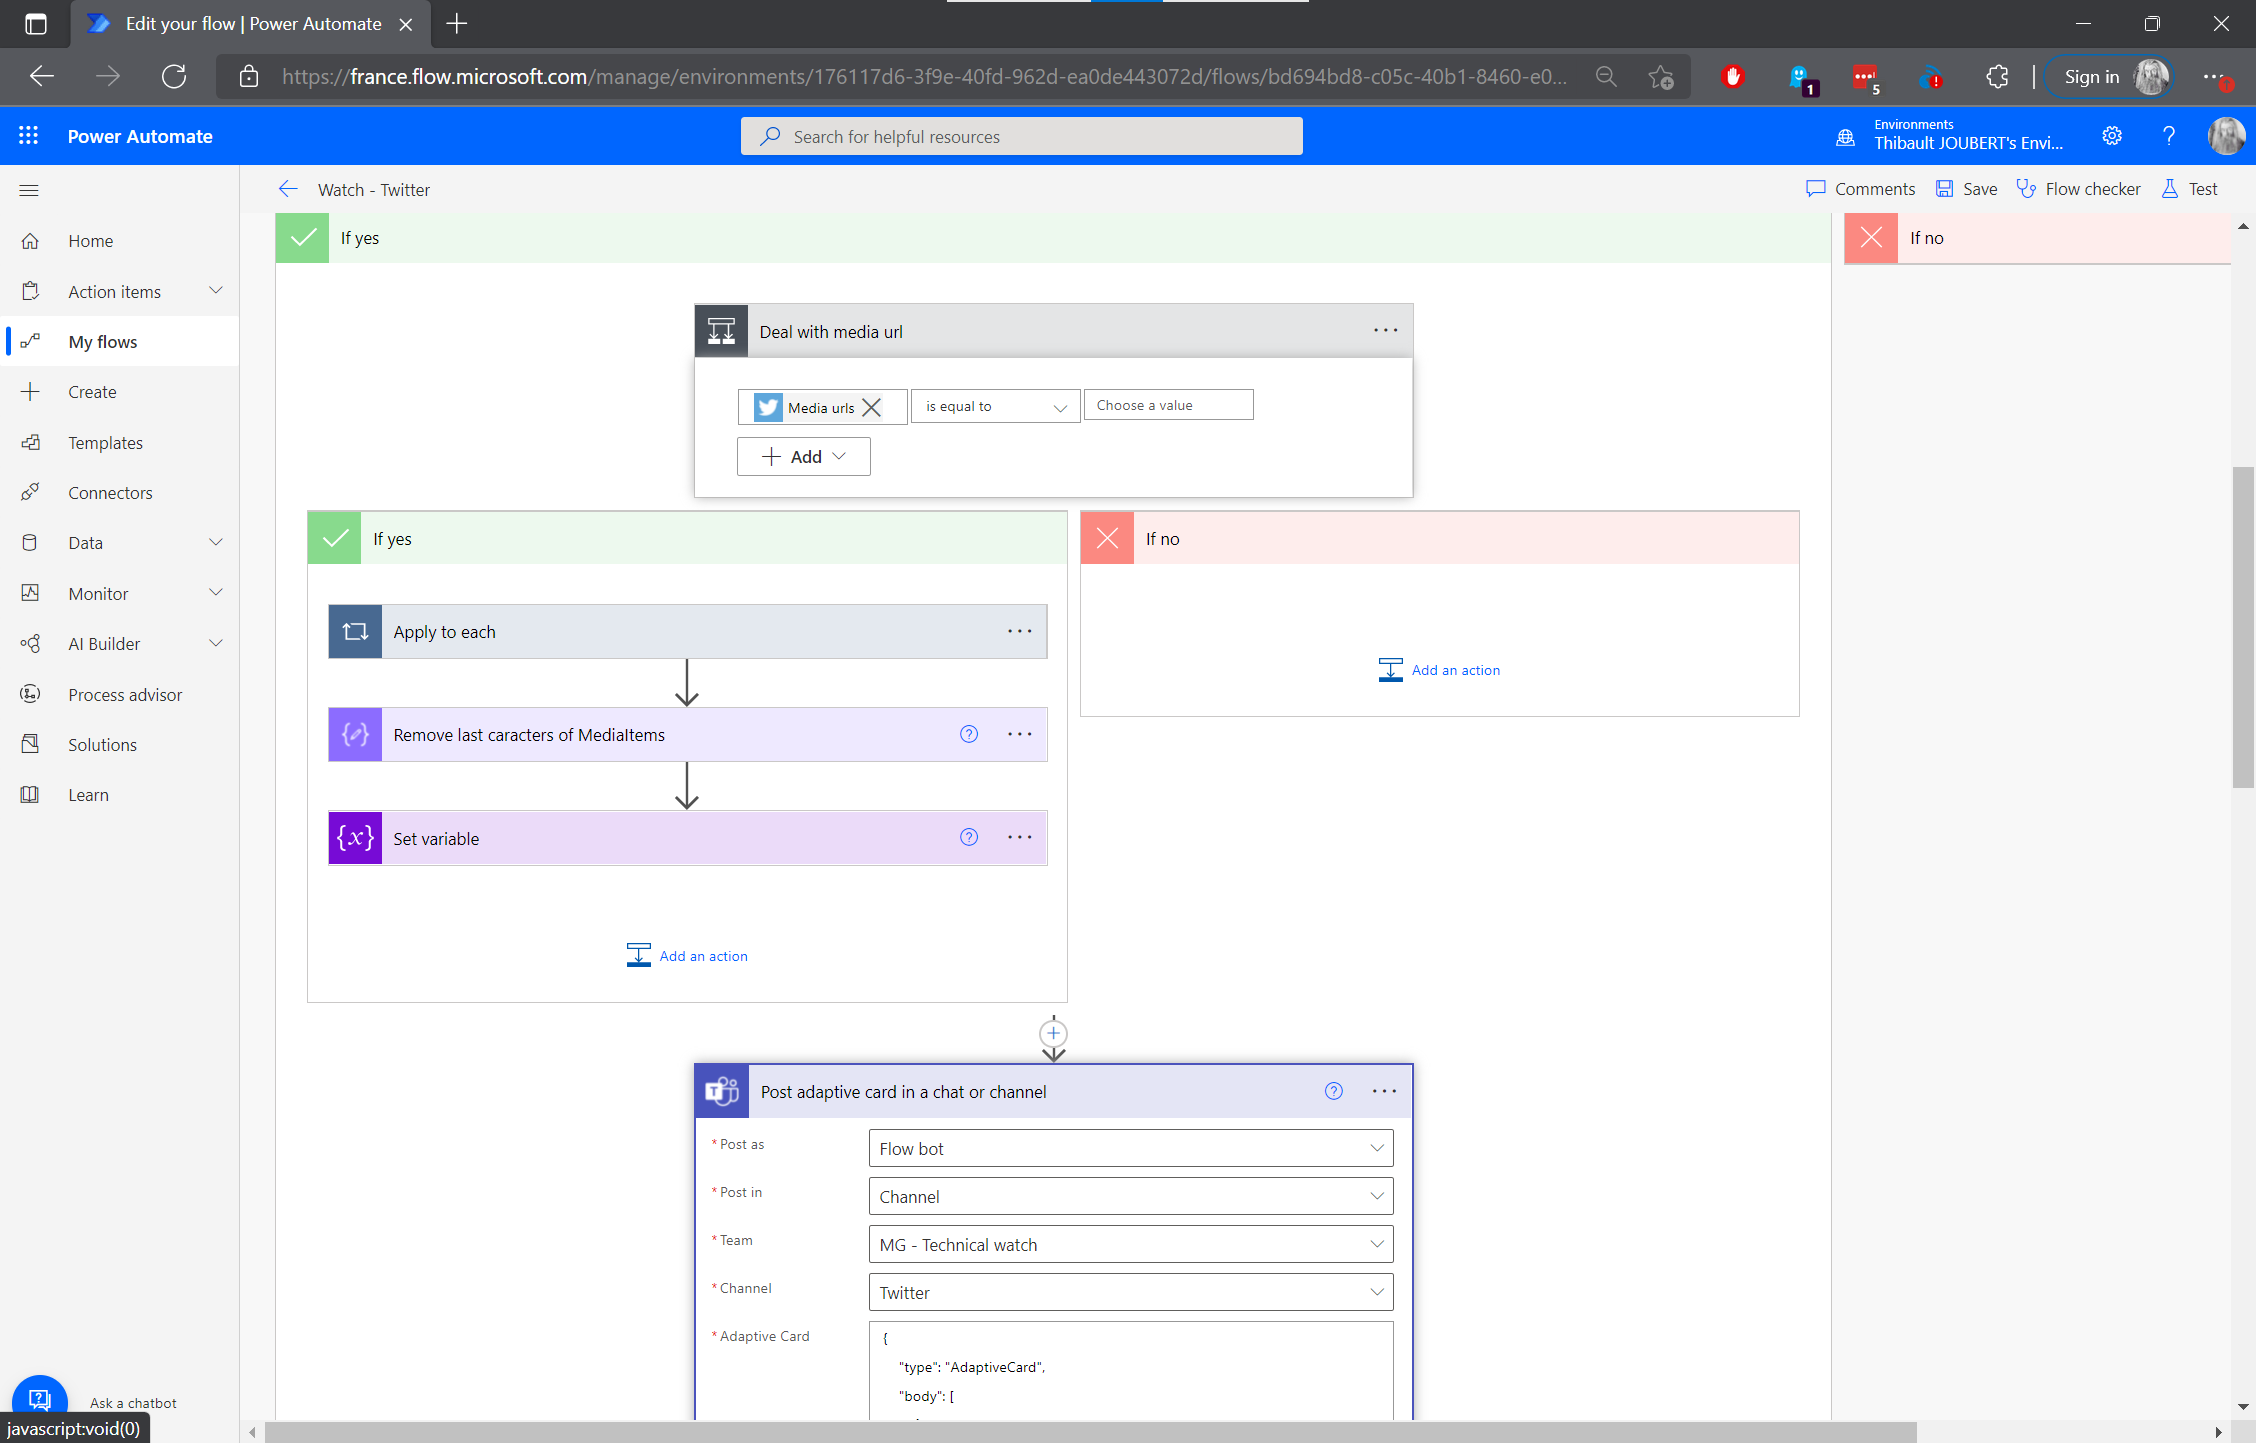
Step 9: The final step is to build an adaptive card and to send it in a chat or channel.
To build the card, I was guided by the articles of Luise Freese Adaptive Cards for Beginners- Monitor a Hashtag on Twitter and Chris Hoard Teams Real Simple with Pictures: Twitter integration with Power Automate post connector retirement, that I modified with the two templates Iimages gallery” and “Activity Update”.
Of course, https://adaptivecards.io/designer/ is an indispensable tool for testing adaptive cards.
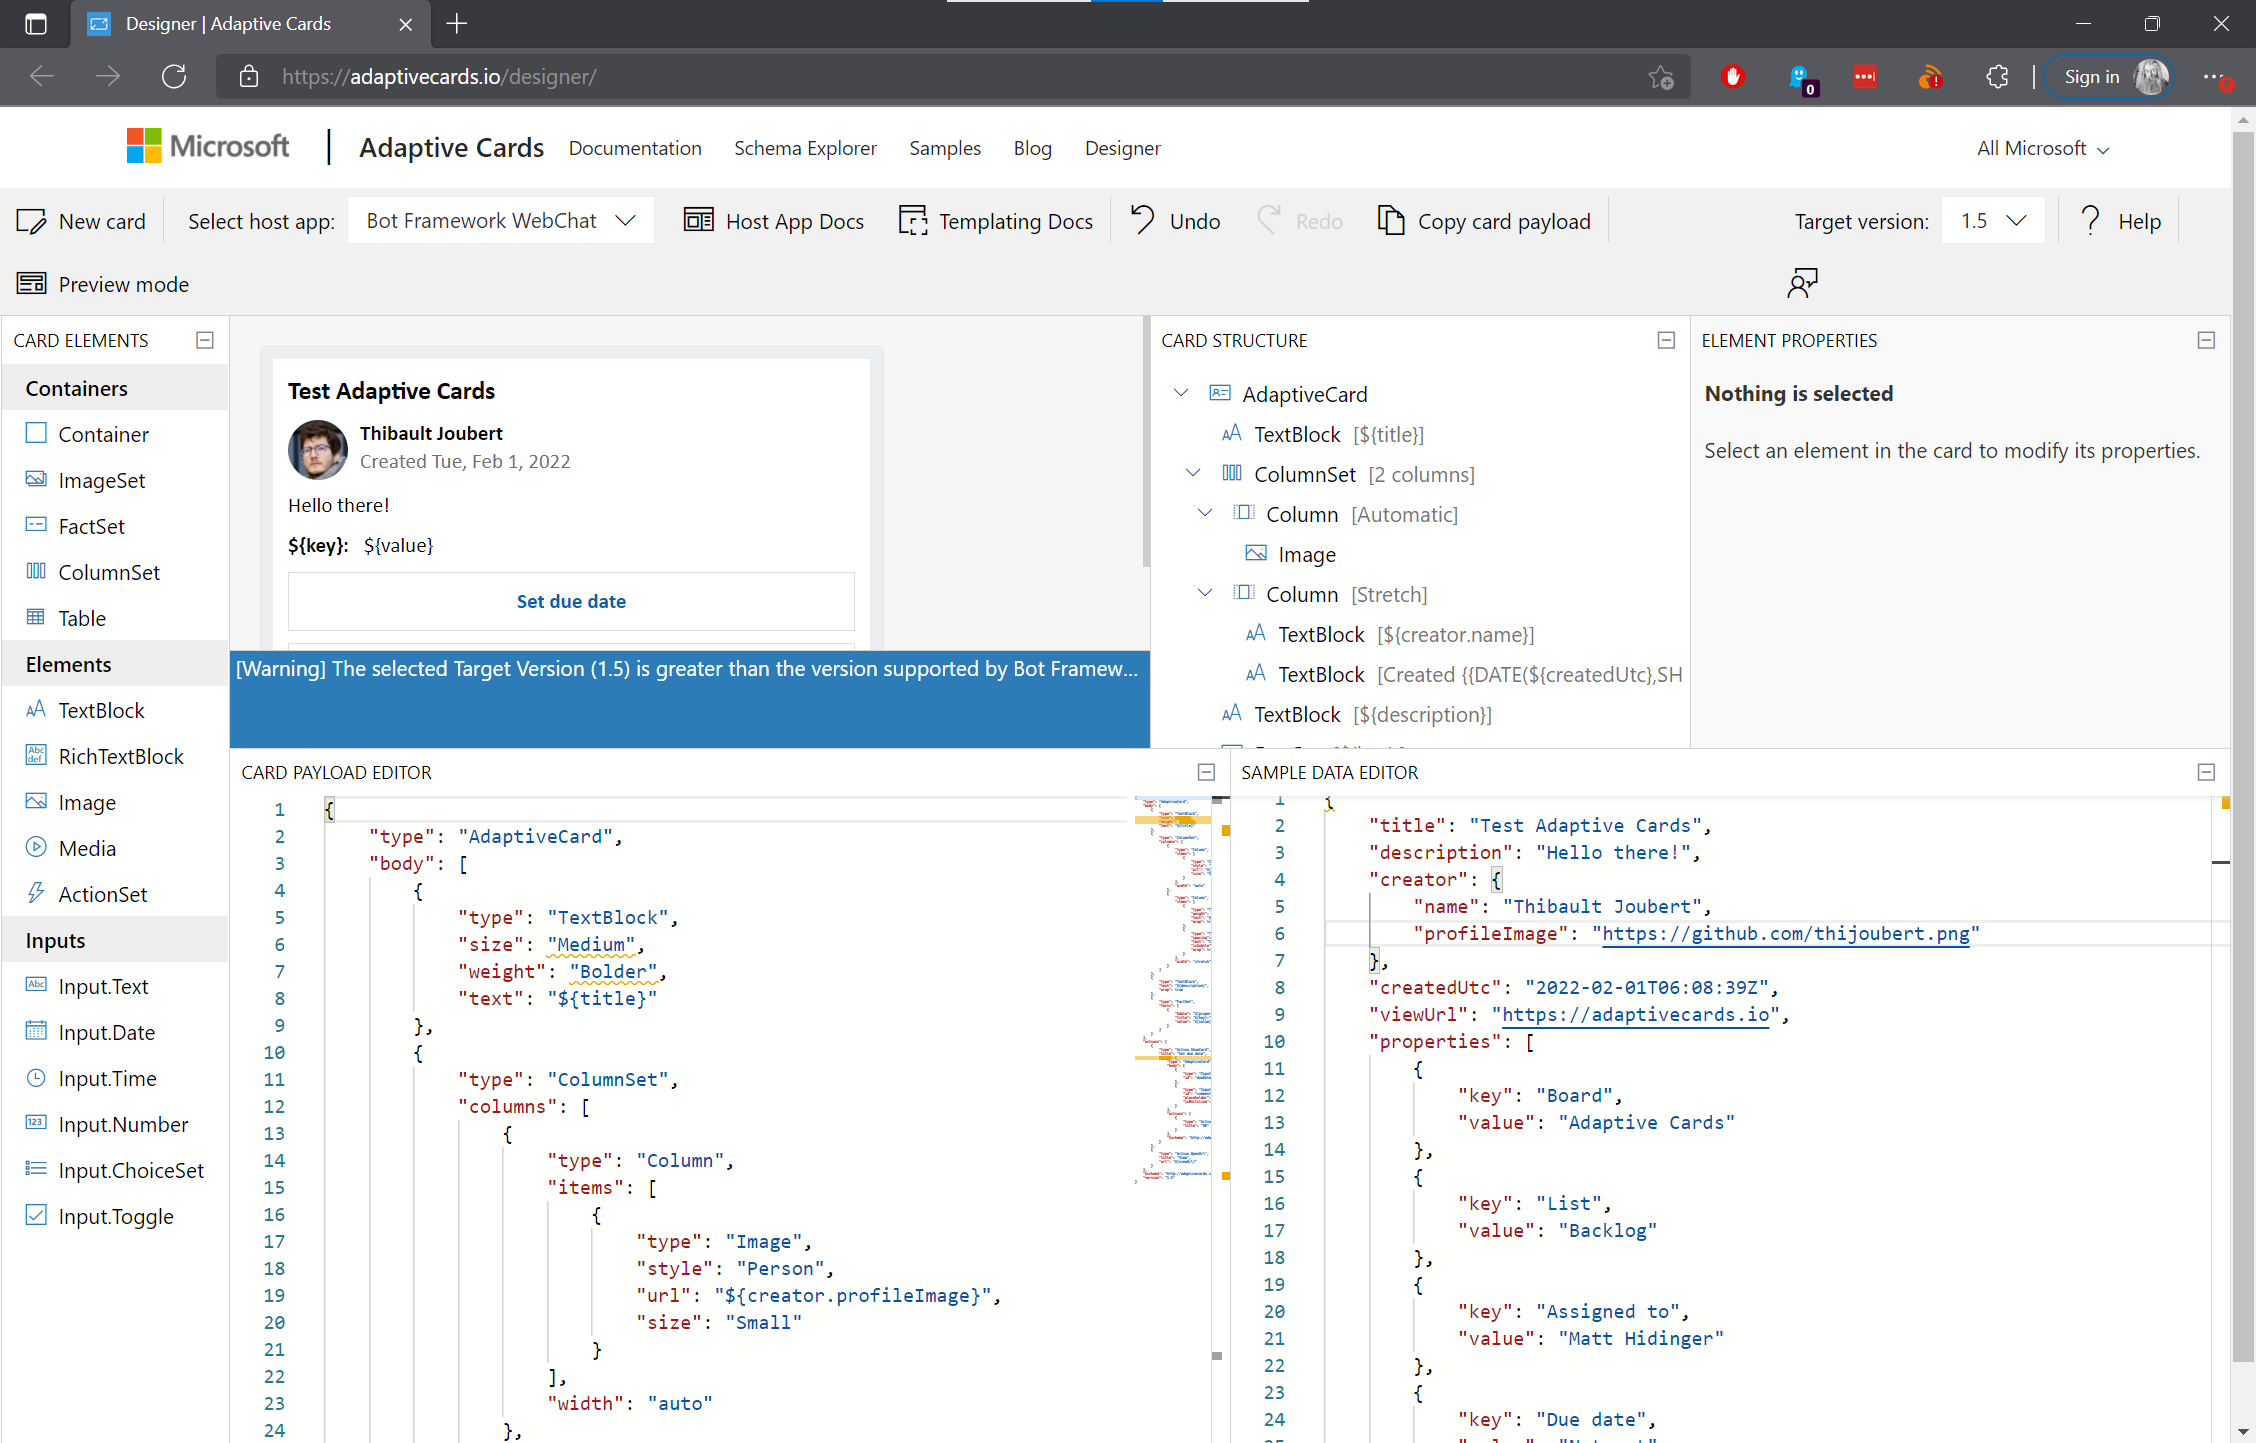
The code used for the adaptive card is the following:
{
    "type": "AdaptiveCard",
    "body": [
        {
            "type": "ColumnSet",
            "columns": [
                {
                    "type": "Column",
                    "items": [
                        {
                            "type": "Image",
                            "style": "Person",
                            "url": "@{triggerOutputs()?['body/UserDetails/ProfileImageUrl']}",
                            "size": "Small"
                        }
                    ],
                    "width": "auto"
                },
                {
                    "type": "Column",
                    "items": [
                        {
                            "type": "TextBlock",
                            "weight": "Bolder",
                            "text": "@{triggerOutputs()?['body/UserDetails/FullName']}",
                            "wrap": true
                        },
                        {
                            "type": "TextBlock",
                            "spacing": "None",
                            "text": "@{triggerOutputs()?['body/UserDetails/UserName']} | Posted at @{triggerOutputs()?['body/CreatedAtIso']}",
                            "isSubtle": true,
                            "wrap": true
                        }
                    ],
                    "width": "stretch"
                }
            ]
        },
        {
            "type": "TextBlock",
            "text": "@{triggerOutputs()?['body/TweetText']}",
            "wrap": true
        },
        {
            "type": "ImageSet",
            "imageSize": "medium",
            "images": [
               @{variables('MediaItems')}
                ]
        }
    ],
    "actions": [
        {
            "type": "Action.OpenUrl",
            "title": "View Tweet",
            "url": "https://twitter.com/@{triggerOutputs()?['body/UserDetails/UserName']}/status/@{triggerOutputs()?['body/TweetId']}/"
        },
        {
            "type": "Action.OpenUrl",
            "title": "View User",
            "url": "https://twitter.com/@{triggerOutputs()?['body/UserDetails/UserName']}/"
        }

    ],
    "msteams": {
        "width": "Full"
    },
    "$schema": "http://adaptivecards.io/schemas/adaptive-card.json",
    "version": "1.2"
}
It is necessary to check that the references in the code are correct (For example : “url”: “@{triggerOutputs()?[‘body/UserDetails/ProfileImageUrl’]}” → “url”: “Profile image url”)
So the result is as follows:
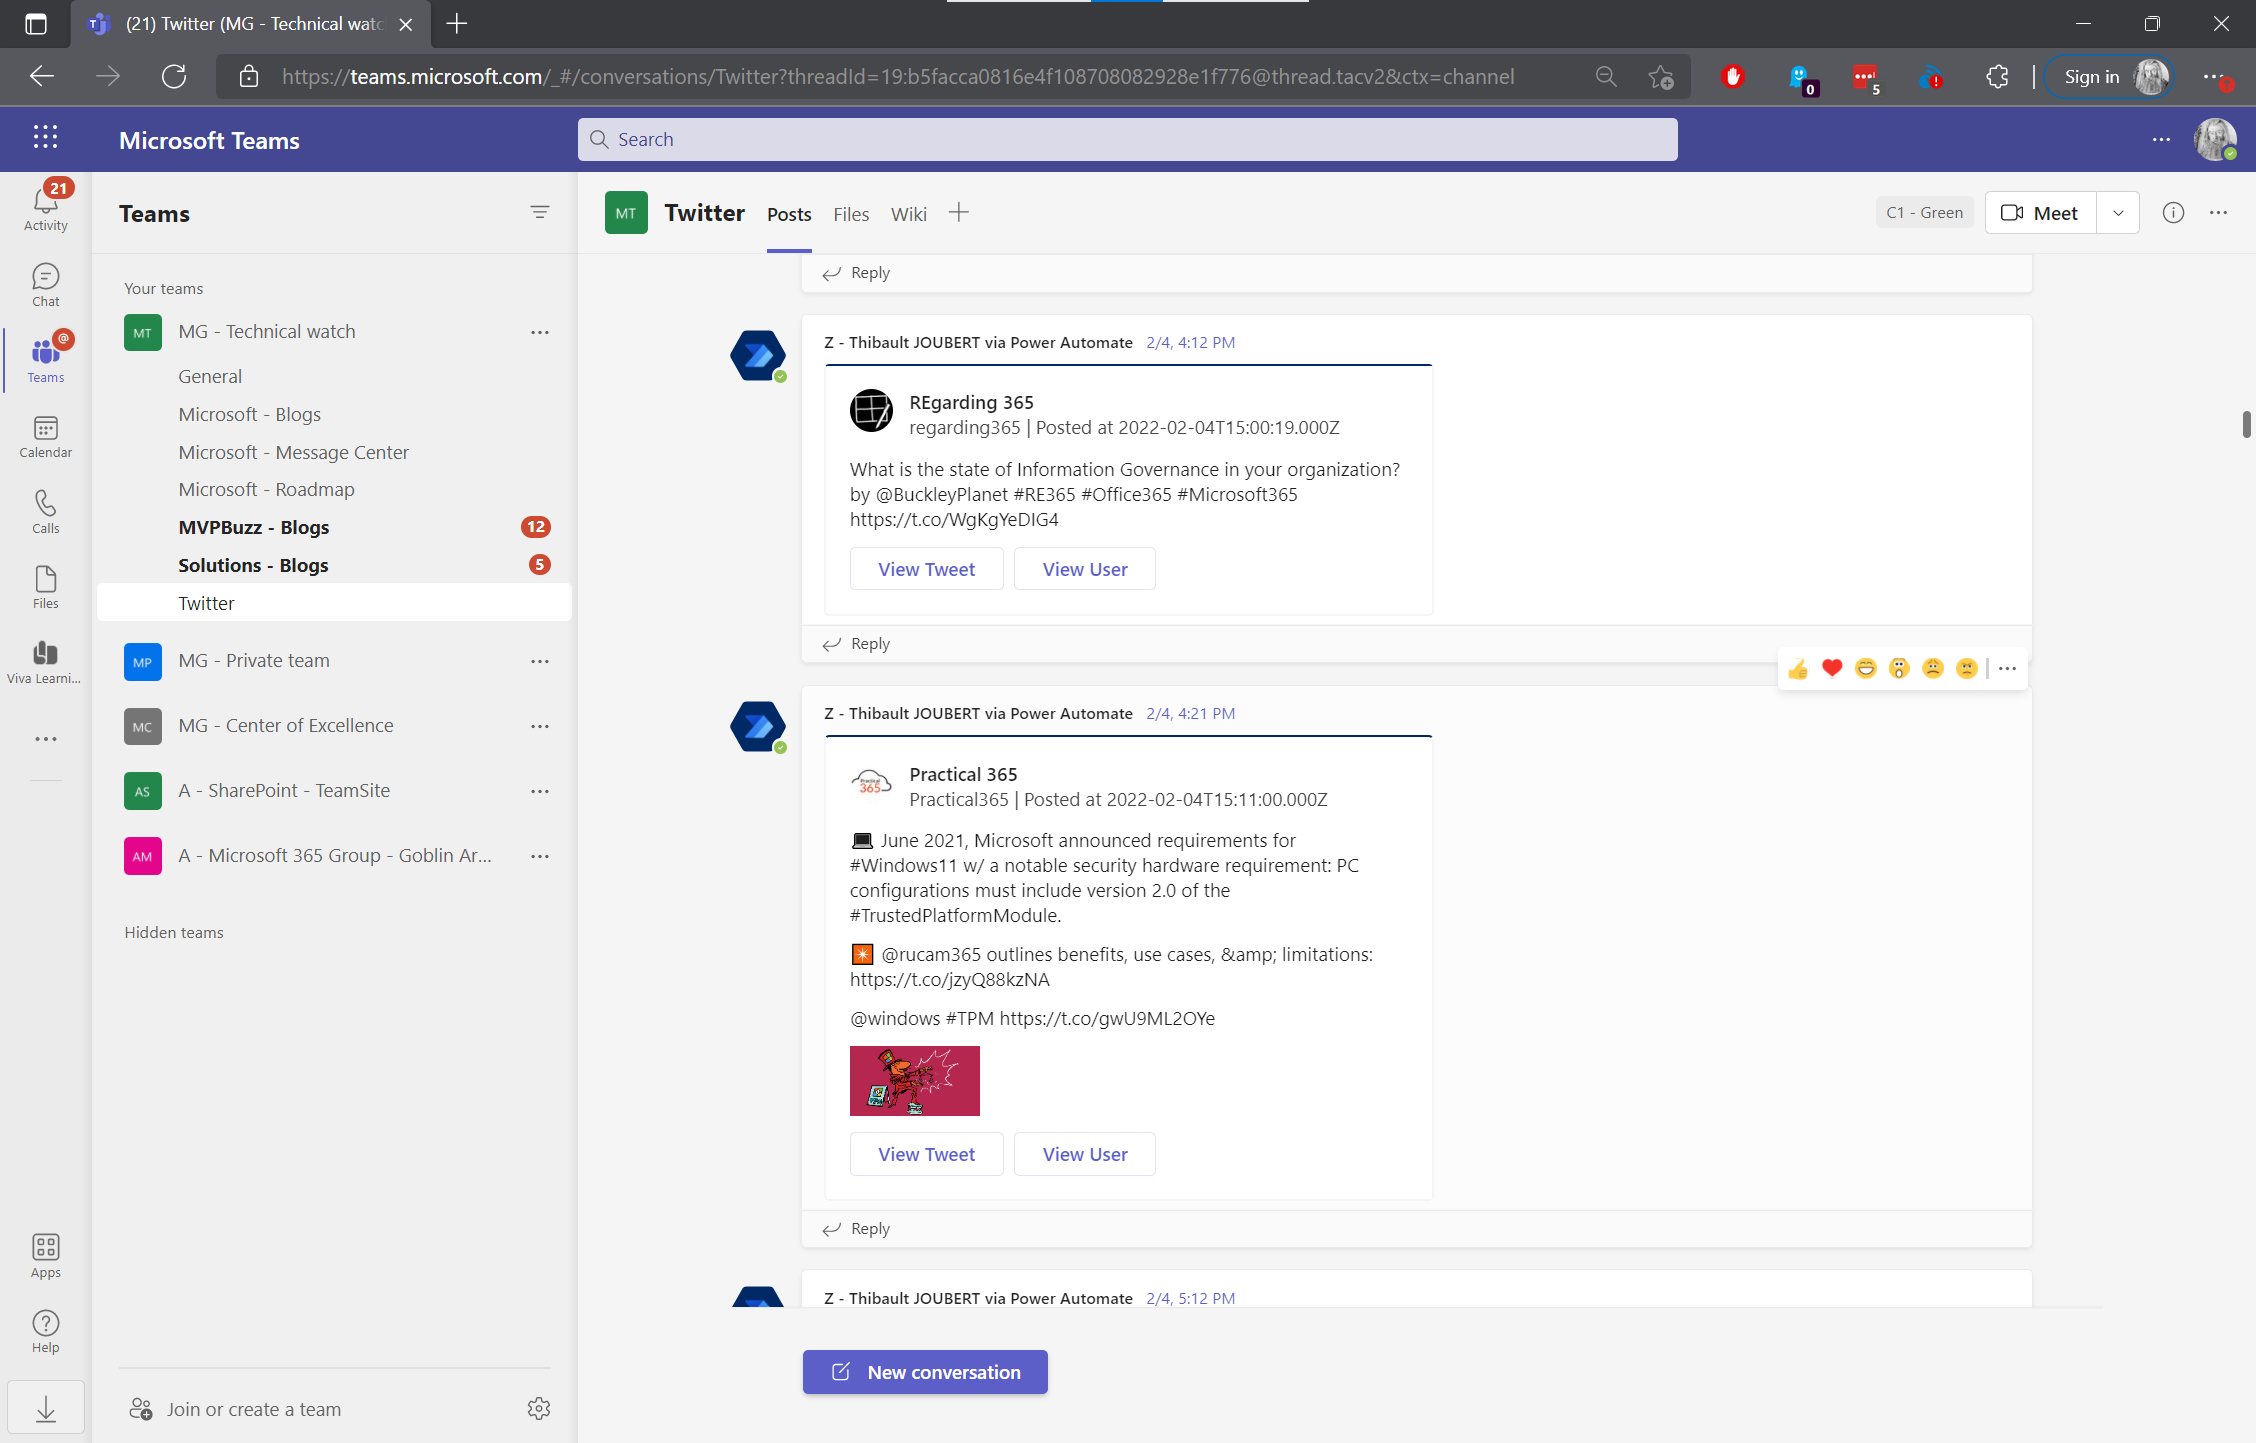
To be honest, I’ve never been much of a Twitter addict, but every once in a while, I check out the notifications to see what’s trending. There’s always something to pick up along the way. And most of all, it was still an interesting exercise!
Conclusion
In these two articles, we have seen how to follow in Teams, the central tool for collaboration in Office 365, the Microsoft 365 roadmap, the Message Center, official and unofficial blogs, Twitter … all in a few minutes per day!
There are surely many other possibilities and ways to improve. I will improve these articles as I improve my flows and my Teams. Feel free to share any ideas for improvements. I’ll be happy to discuss them.